Difference between revisions of "Recovery to Files"
(Created page with " ==Headline== To set up the type of Migration or "Personality" switch over to the WebGUI of the Appliance ===Step 1.1=== Verify that the Dashboard should already have an En...") |
|||
| Line 4: | Line 4: | ||
To set up the type of Migration or "Personality" switch over to the WebGUI of the Appliance | To set up the type of Migration or "Personality" switch over to the WebGUI of the Appliance | ||
| − | ===Step | + | ===Step 1=== |
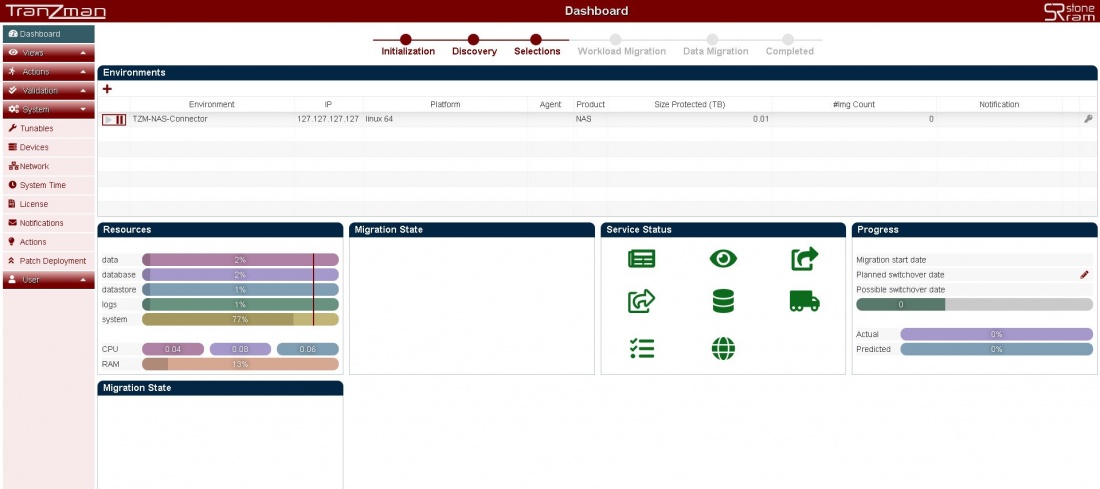
Verify that the Dashboard should already have an Environment with name <b>TZM-NAS-Connector</b>. | Verify that the Dashboard should already have an Environment with name <b>TZM-NAS-Connector</b>. | ||
| Line 11: | Line 11: | ||
[[File:Discovery.jpg|border|1100x800px]] | [[File:Discovery.jpg|border|1100x800px]] | ||
| − | ===Step | + | ===Step 2=== |
Click the <b>+</b> button and add the origin backup environment.Enter the IP and select the platform of the backup server and hit Committ button. | Click the <b>+</b> button and add the origin backup environment.Enter the IP and select the platform of the backup server and hit Committ button. | ||
| Line 17: | Line 17: | ||
[[File:AddEnvironment.jpg|border|1100x800px]] | [[File:AddEnvironment.jpg|border|1100x800px]] | ||
| − | ===Step | + | ===Step 3=== |
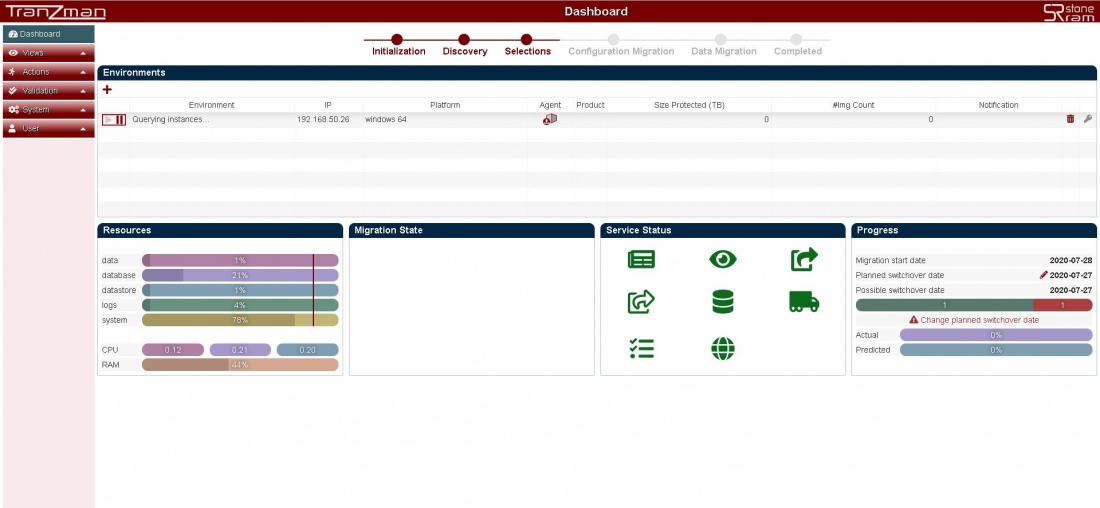
The Dashboard should now give you an environment with name as <b>Querying instances...</b> and IP address of your backup environment. | The Dashboard should now give you an environment with name as <b>Querying instances...</b> and IP address of your backup environment. | ||
| Line 24: | Line 24: | ||
[[File:AgentDownload.jpg|border|1100x800px]] | [[File:AgentDownload.jpg|border|1100x800px]] | ||
| − | ===Step | + | ===Step 4=== |
Copy the file over to the backup server and install it.Make sure you either run the setup as administrator/root or as a user used to configure backup services. | Copy the file over to the backup server and install it.Make sure you either run the setup as administrator/root or as a user used to configure backup services. | ||
| Line 33: | Line 33: | ||
[[File:AgentInstall.jpg|border|1100x900px]] | [[File:AgentInstall.jpg|border|1100x900px]] | ||
| − | ===Step | + | ===Step 5=== |
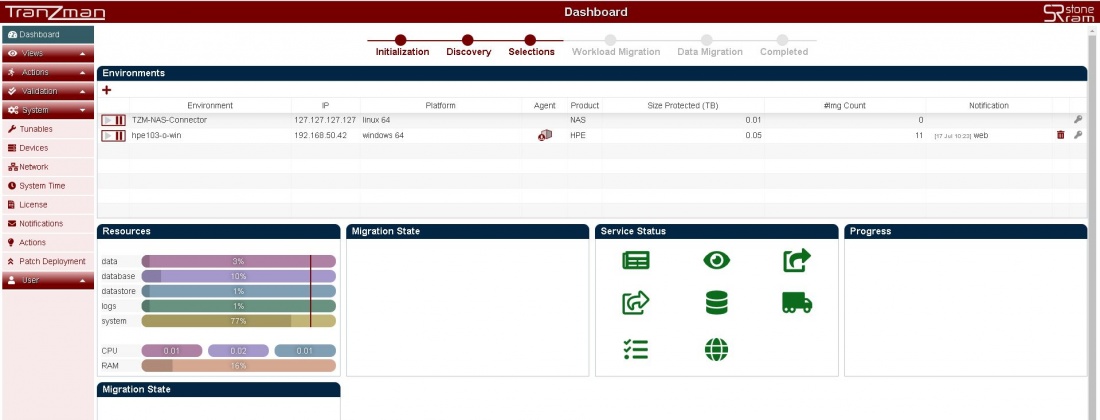
Upon successfull installation of the Agent on the backup server all the columns for the newly added environment should be populated like e.g. As shown in the below picture. | Upon successfull installation of the Agent on the backup server all the columns for the newly added environment should be populated like e.g. As shown in the below picture. | ||
Revision as of 14:15, 6 August 2020
Headline
To set up the type of Migration or "Personality" switch over to the WebGUI of the Appliance
Step 1
Verify that the Dashboard should already have an Environment with name TZM-NAS-Connector. The Dashboard enables you to check and monitor the TZM Appliance resources, migration state , service status , progress and state of Environments.
Step 2
Click the + button and add the origin backup environment.Enter the IP and select the platform of the backup server and hit Committ button.
Step 3
The Dashboard should now give you an environment with name as Querying instances... and IP address of your backup environment.
Under the Agent Column hit the ![]() button , this should download you a Agent package (.bin file if Origin is *nix or .exe file if Origin is Windows).
button , this should download you a Agent package (.bin file if Origin is *nix or .exe file if Origin is Windows).
Step 4
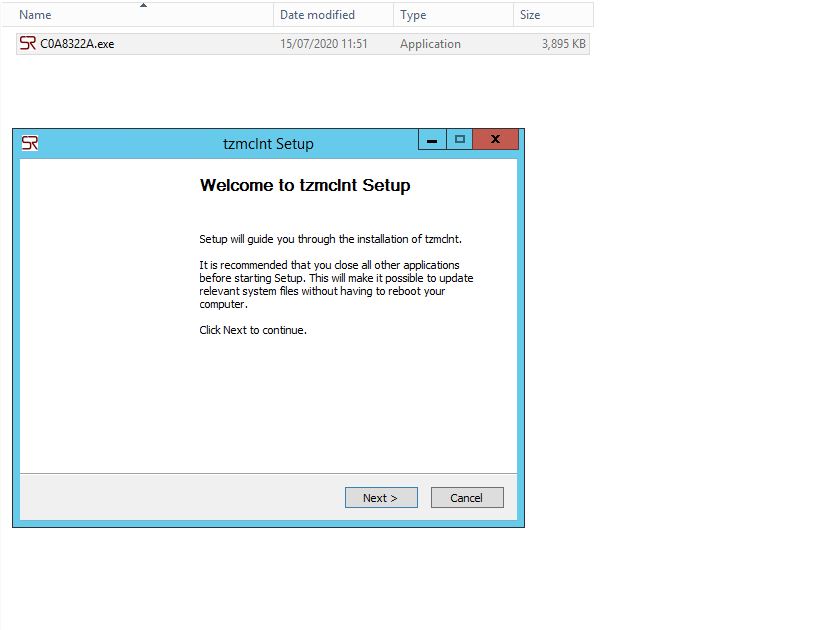
Copy the file over to the backup server and install it.Make sure you either run the setup as administrator/root or as a user used to configure backup services. Follow the instructions on the screen during install.
e.g. Install of Agent on a Windows Server.
Step 5
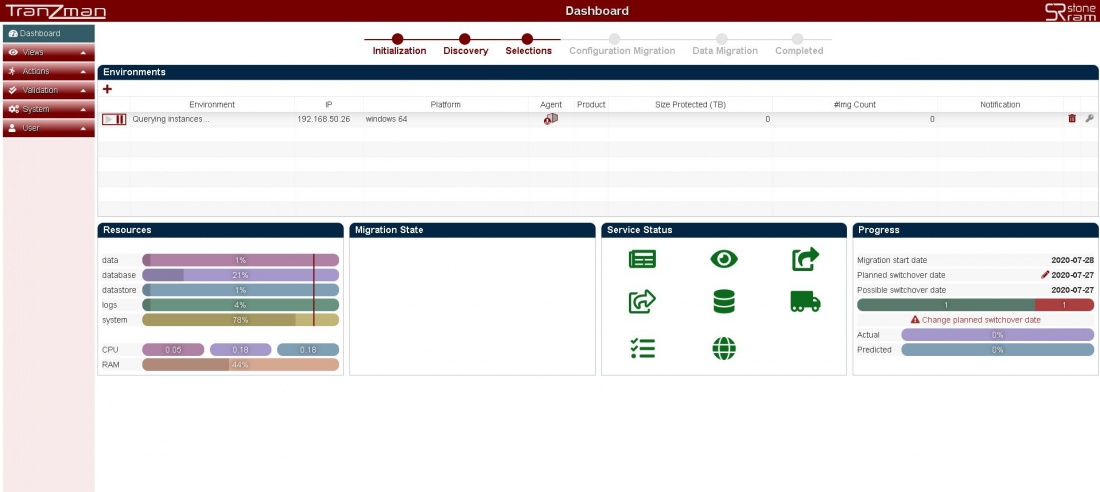
Upon successfull installation of the Agent on the backup server all the columns for the newly added environment should be populated like e.g. As shown in the below picture.
Note:- Repeat the above steps for all the environments to be added.
