Difference between revisions of "Recover SAPMaxDB"
m (Admin moved page RecoverSAP to Recover SAPMaxDB) |
|||
| (5 intermediate revisions by the same user not shown) | |||
| Line 1: | Line 1: | ||
To start the restore process, a database session needs to be created. | To start the restore process, a database session needs to be created. | ||
| + | __NOTOC__ | ||
| + | ==='''Step 1'''=== | ||
| + | Login to the NetBackup GUI and navigate to '''Backup, Archive and Restore''' section. | ||
| + | |||
| + | [[File:NBU-RestoreFiles.jpg]] | ||
| + | |||
| + | ==='''Step 2'''=== | ||
| + | Click on the '''Restore Files''' tab and select the Source, Destination Client and type of Policy to restore the MaxDB backup files. | ||
| + | The '''Policy Type''' will be '''Standard'''. | ||
| + | |||
| + | [[File:MaxDB-RestoreSelection.jpg]] | ||
| + | |||
| + | ==='''Step 3'''=== | ||
| + | Under '''Browse Directory''' select the MaxDB database backup files to restore. | ||
| + | |||
| + | [[File:MaxDB-BrowseDirectory.jpg]] | ||
| + | |||
| + | ==='''Step 4'''=== | ||
| + | Choose to restore to a different location, and change the target destination to a temporary location on the SAP_MaxDB Server. '''''i.e. C:\MaxDB\Backup''''' | ||
| − | + | [[File:MaxDB-RestoreDirectory.jpg]] | |
| + | ==='''Step 5'''=== | ||
Create a database session. | Create a database session. | ||
| Line 10: | Line 30: | ||
|} | |} | ||
| − | ==='''Step | + | ==='''Step 6'''=== |
| − | |||
Create a backup template. | Create a backup template. | ||
| Line 39: | Line 58: | ||
|} | |} | ||
| − | ==='''Step | + | ==='''Step 7'''=== |
| − | |||
Copy the recovered files to the location of the backup template. | Copy the recovered files to the location of the backup template. | ||
| Line 52: | Line 70: | ||
|} | |} | ||
| − | ==='''Step | + | ==='''Step 8'''=== |
| − | |||
If the outputs from these commands show a return code of 0, the information was checked successfully. | If the outputs from these commands show a return code of 0, the information was checked successfully. | ||
| Line 65: | Line 82: | ||
|} | |} | ||
| − | + | ||
| + | ---- | ||
| + | Use this link to go back to the main [[recoverydocs]] Page. | ||
Latest revision as of 13:43, 31 January 2019
To start the restore process, a database session needs to be created.
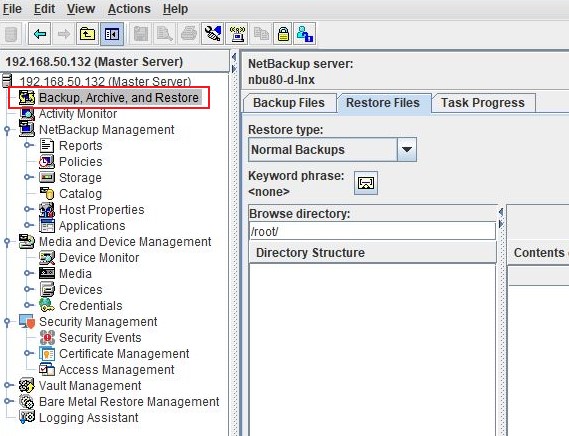
Step 1
Login to the NetBackup GUI and navigate to Backup, Archive and Restore section.
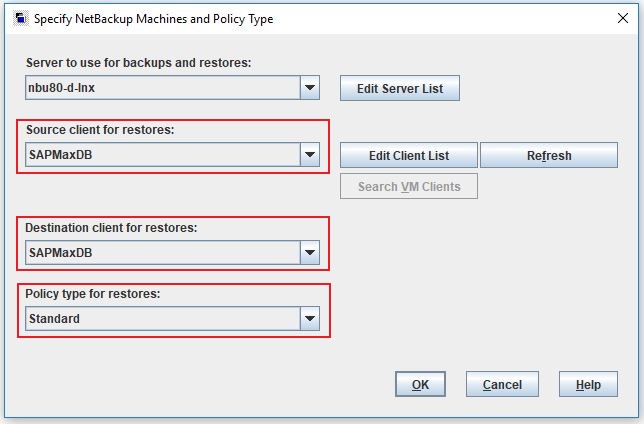
Step 2
Click on the Restore Files tab and select the Source, Destination Client and type of Policy to restore the MaxDB backup files. The Policy Type will be Standard.
Step 3
Under Browse Directory select the MaxDB database backup files to restore.
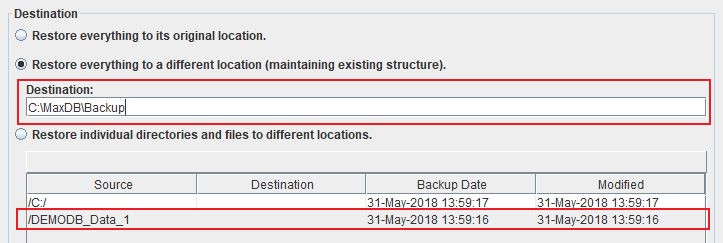
Step 4
Choose to restore to a different location, and change the target destination to a temporary location on the SAP_MaxDB Server. i.e. C:\MaxDB\Backup
Step 5
Create a database session.
|
dbmcli -u DBM,DBM -d DEMODB |
Step 6
Create a backup template.
The format to follow will be;
- backup_template_create <backup_template> to <backup_destination> <backup_content>
Create a template d1 for data backup.
|
dbmcli on DB1> backup_template_create d1 to FILE C:\MaxDB\Backup\DAT0001 CONTENT DATA |
Create a template l1 for log backup.
|
dbmcli on DB1> backup_template_create l1 to FILE C:\MaxDB\Backup\LOG CONTENT LOG |
Create a template md for a data backup using files in parallel.
|
dbmcli on DB1> backup_template_create md to FILE C:\MaxDB\Backup\DAT0001 NAMED b1 FILE C:\MaxDB\Backup\DAT0002 NAMED b2 CONTENT DATA |
Step 7
Copy the recovered files to the location of the backup template.
Check if the backup can be accessed and that data reading will work. A service session is requires as follows;
|
dbmcli on DB1> db_admin dbmcli on DB1> service_connect dbmcli on DB1> recover_check <backup_template> <backup_type> |
Step 8
If the outputs from these commands show a return code of 0, the information was checked successfully.
To start the restore of this data, use the following commands;
|
dbmcli on DB1> service_release dbmcli on DB1> db_connect dbmcli on DB1> recover_start <backup_template> <backup_type> |
Use this link to go back to the main recoverydocs Page.


