Difference between revisions of "Install VA - Hyper-V"
| Line 37: | Line 37: | ||
==='''Step 6'''=== | ==='''Step 6'''=== | ||
| − | At this stage, point it to the correct ISO image, or leave it out to install the operating system at a later date. | + | At this stage, point it to the correct '''ISO image''', or leave it out to install the operating system at a later date. |
==='''Step 7'''=== | ==='''Step 7'''=== | ||
Revision as of 11:56, 4 January 2019
This is the installation guide for creating your own Tranzman Virtual Appliance under Microsoft Hyper-V.
Step 1
Launch Hyper-V manager and "Create a New Virtual Machine". Give the machine a unique name that will make it easy to identify, i.e. Tranzman - VA
Step 2
Select Generation 1 machine.
Step 3
Select 2GB of RAM size. If you use Dynamic Memory, make sure that the Maximum RAM is set to this size.
Step 4
For the NIC settings, select an External Virtual Switch.
Step 5
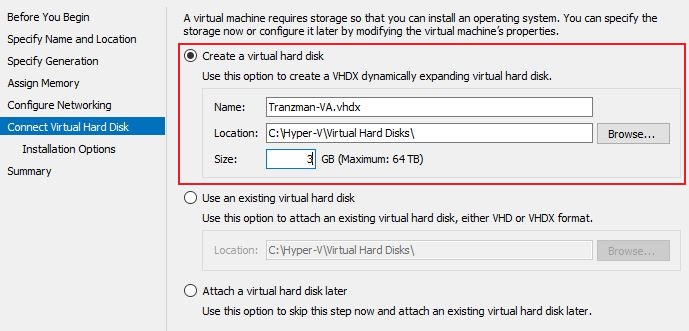
Assign two virtual hard disks as specified below.
- 1 x 3GB HDD for OS Installation
- 1 x 20GB HDD for Data
You will need to edit the machine later to add the second 20GB Hard Drive.
Step 6
At this stage, point it to the correct ISO image, or leave it out to install the operating system at a later date.
Step 7
Press Finish at the end of the process to start the creation of the VA, and proceed to install the OS once the process completes.
Use this link to go back to the main Installation Page.


