Difference between revisions of "Create Bootable TZM USB using Rufus"
From Tranzman Documentation
| (5 intermediate revisions by the same user not shown) | |||
| Line 1: | Line 1: | ||
| + | == Headline== | ||
| + | This is the installation guide for creating your own bootable USB for TZM install on to physical servers. | ||
| − | |||
===Step 1=== | ===Step 1=== | ||
| Line 8: | Line 9: | ||
[[ File: Picture_Step_1.JPG |border|600px ]] | [[ File: Picture_Step_1.JPG |border|600px ]] | ||
| + | |||
===Step 2=== | ===Step 2=== | ||
| Line 14: | Line 16: | ||
[[ File: Picture_Step_2.JPG |border|600px]] | [[ File: Picture_Step_2.JPG |border|600px]] | ||
| + | |||
===Step 3=== | ===Step 3=== | ||
| Line 23: | Line 26: | ||
[[ File: Picture_Step_3_1.JPG |border|600px]] | [[ File: Picture_Step_3_1.JPG |border|600px]] | ||
| + | |||
===Step 4=== | ===Step 4=== | ||
| Line 29: | Line 33: | ||
[[ File: Picture_Step_4.JPG |border|600px]] | [[ File: Picture_Step_4.JPG |border|600px]] | ||
| + | |||
===Step 5=== | ===Step 5=== | ||
| Line 35: | Line 40: | ||
[[ File: Picture_Step_5.JPG |border|600px]] | [[ File: Picture_Step_5.JPG |border|600px]] | ||
| + | |||
Latest revision as of 09:40, 6 August 2020
Headline
This is the installation guide for creating your own bootable USB for TZM install on to physical servers.
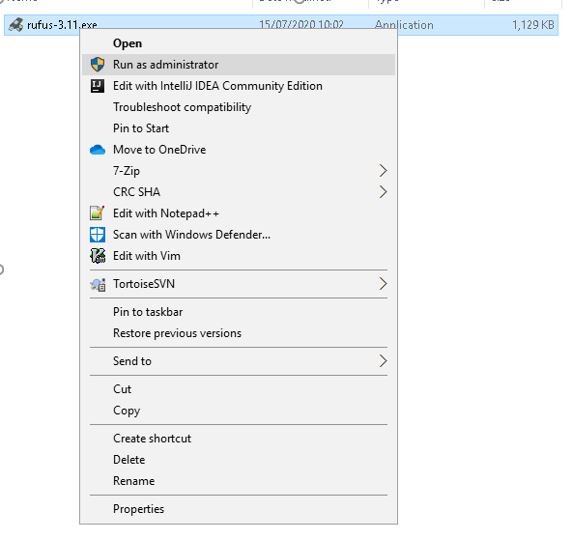
Step 1
Launch Rufus with administrator privileges.
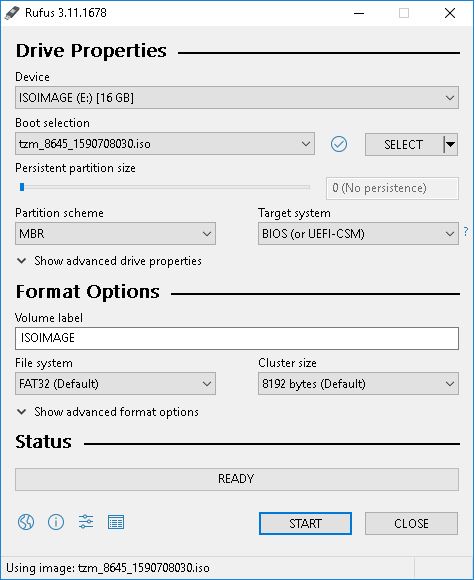
Step 2
Click the select button and select the TZM ISO image to use.
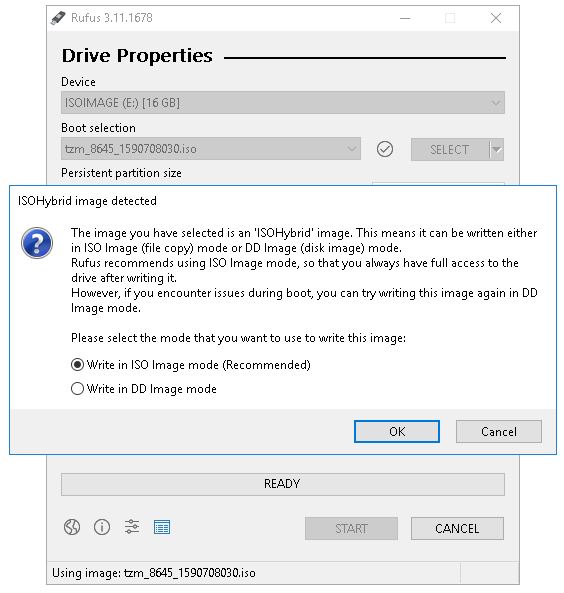
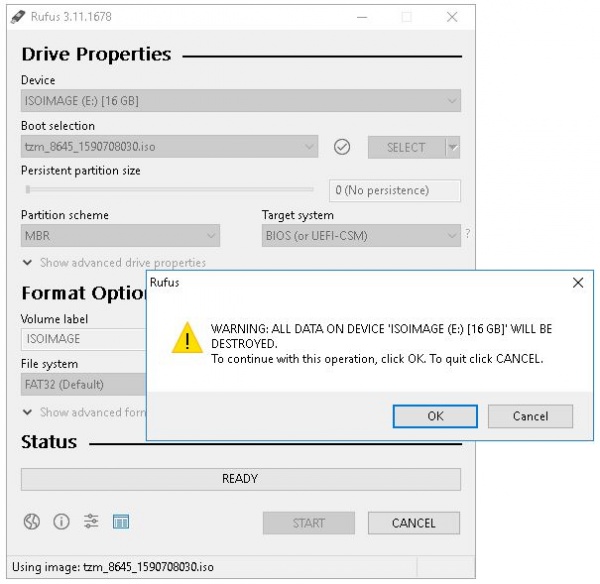
Step 3
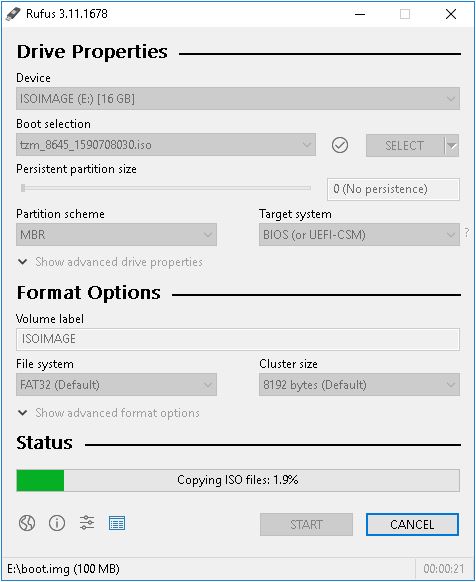
Rufus will automatically modify the settings to best match it. Click the Start button to begin the process. You'll be prompted with a couple of warnings. Please proceed with ISO(recommended) mode for first and click OK for next warning.
Step 4
Wait for the Rufus operations to complete.
Step 5
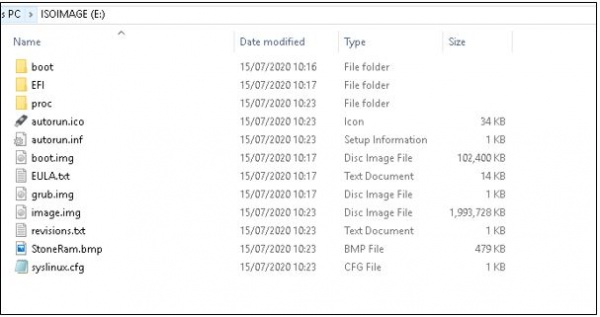
Verify the files were copied over to the USB drive.
