Install TZM Server
From Tranzman Documentation
Deploying Tranzman Appliance on Virtual/Physical Machine
This section explains how to install the Tranzman Server from ISO image provided by Stone Ram Ltd.
Follow the steps below to deploy the appliance on a virtual or physical machine.
Deployment Steps
-
Create a Virtual Machine in ESXi server by clicking on Create/Register VM.
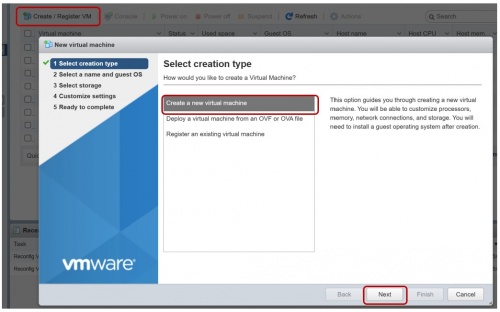
- Select Create a new virtual machine and click Next.
-
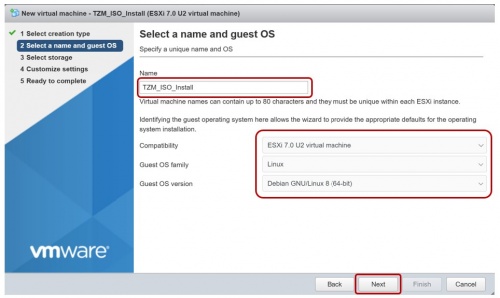
In Select a name and guest OS, give a name to the VM and select appropriate OS type and version.
- Select the available storage from datastore and click on Next.
- Select Datastore ISO file for CD/DVD Drive and choose the downloaded TZM ISO. Click Next and Finish.
- Power On the created VM.
-
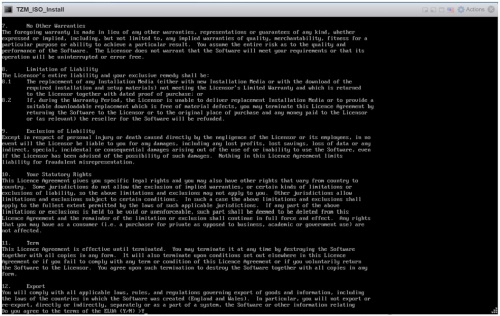
Accept the EULA. Use the Page Down key to scroll through the document. Press Q on the keyboard, followed by Y to accept the terms.
-
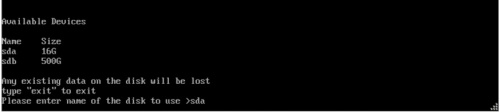
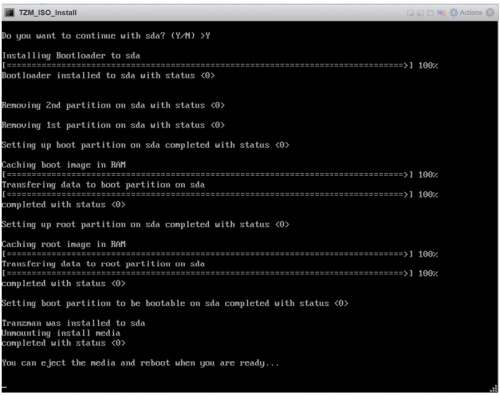
Select the base OS disk (sda) and wait for the OS installation. Reboot the machine after installation completes.
-
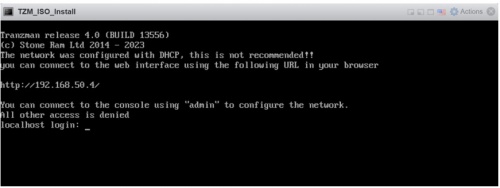
The machine will look on the network for an available NTP and DHCP server.
If you have a DHCP enabled environment and the machine is able to get an IP from DHCP Server, it will be displayed in the login screen.
Use this IP for webUI login to continue with the Configuration.
Otherwise, go to Configure IP Network to manually set an appliance IP.


🛈 For further configuration, refer to the Configuration section. If manual IP setup is required, see Configure IP Network.