Difference between revisions of "Install TZM Server"
| Line 13: | Line 13: | ||
==='''Step 3'''=== | ==='''Step 3'''=== | ||
Once the install process is finished, disconnect the install media and restart machine. | Once the install process is finished, disconnect the install media and restart machine. | ||
| + | |||
| + | [[File:Install_TZM_sda_install.JPG]] | ||
==='''Step 4'''=== | ==='''Step 4'''=== | ||
Revision as of 09:36, 6 September 2018
This section explains how to install the Tranzman Server from files provided by Stone Ram Ltd.
Contents
Step 1
Power on your virtual/physical machine with the ISO file inserted for booting. On the first page, the EULA agreement has to be accepted before proceeding.
Use the "Page Down" key to cycle through the document. Press Q on the keyboard, followed by Y to accept the terms.
Step 2
The installer will scan the system for available hard drives. Tranzman Server needs to be installed to the device "sda".
File:Install TZM Available Devices.JPG
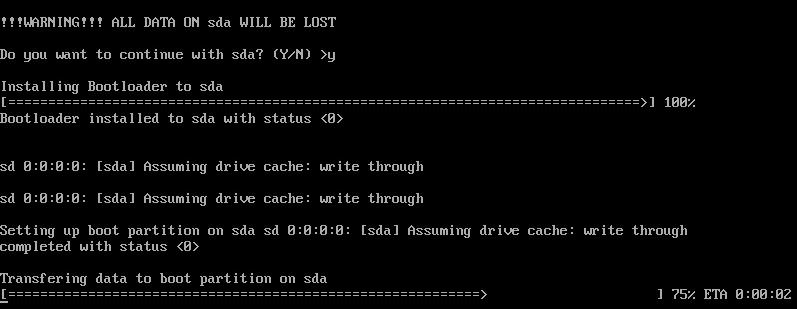
Step 3
Once the install process is finished, disconnect the install media and restart machine.
Step 4
The machine will look on the network for an available NTP and DHCP server. Once a valid IP is gained, the boot process will continue. IP address will be shown on screen, and instructions on how to log onto the machine will be displayed.
Supported Systems for Installation are:
- Microsoft Windows 2003 (or higher)
- AIX 6.1 (or higher)
- SunOS 10 Sparc (or higher)
- HP-UX 11.X (or higher)
- Linux Kernel 2.6 (or higher)
Software Requirements
- On Linux/Unix systems root access is needed.
- On Windows systems local system is needed.
- On the internal network open port 5555 on the firewalls.
The Tranzman application requires access to a share on the source machine for migration purposes. This share can be in the form of NFS/Samba Volumes under Linux/Unix. Only read only rights are required on this share.
Under Windows an SMB share would also need to be created. This can easily be done from Command Prompt,
|
C:\WINDOWS\system32\net share <sharename=drive:path> |
