Difference between revisions of "Create Bootable TZM USB using Rufus"
From Tranzman Documentation
(Created page with "This is the installation guide for creating your own bootable USB for TZM install on to physical servers. __NOTOC__ ==='''Step 1'''=== Launch Rufus with administrator privil...") |
|||
| Line 17: | Line 17: | ||
Rufus will automatically modify the settings to best match it. Click the Start button to begin the process. You'll be prompted with a couple of warnings. Please proceed with ISO(recommended) mode for first and click OK for next warning. | Rufus will automatically modify the settings to best match it. Click the Start button to begin the process. You'll be prompted with a couple of warnings. Please proceed with ISO(recommended) mode for first and click OK for next warning. | ||
| + | |||
[[ File: Picture_Step_3.JPG |border|600px]] | [[ File: Picture_Step_3.JPG |border|600px]] | ||
| + | |||
[[ File: Picture_Step_3_1.JPG |border|600px]] | [[ File: Picture_Step_3_1.JPG |border|600px]] | ||
Revision as of 13:23, 15 July 2020
This is the installation guide for creating your own bootable USB for TZM install on to physical servers.
Step 1
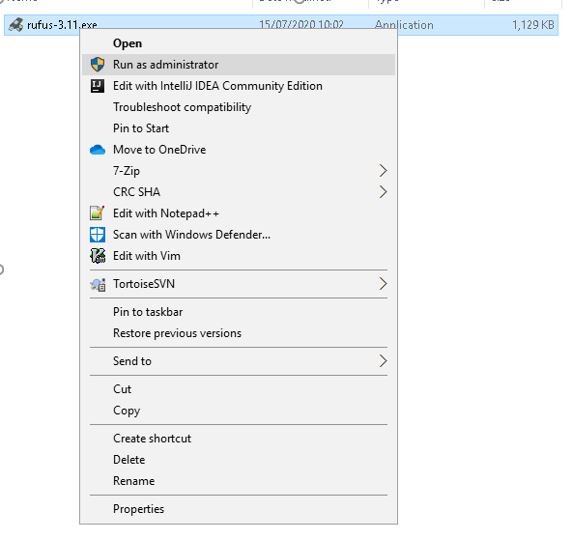
Launch Rufus with administrator privileges.
Step 2
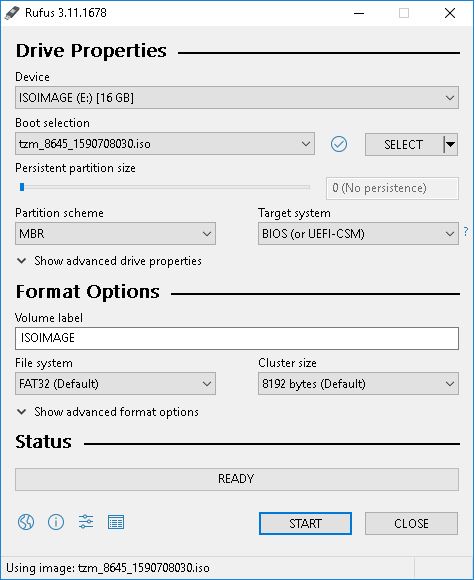
Click the select button and select the TZM ISO image to use.
Step 3
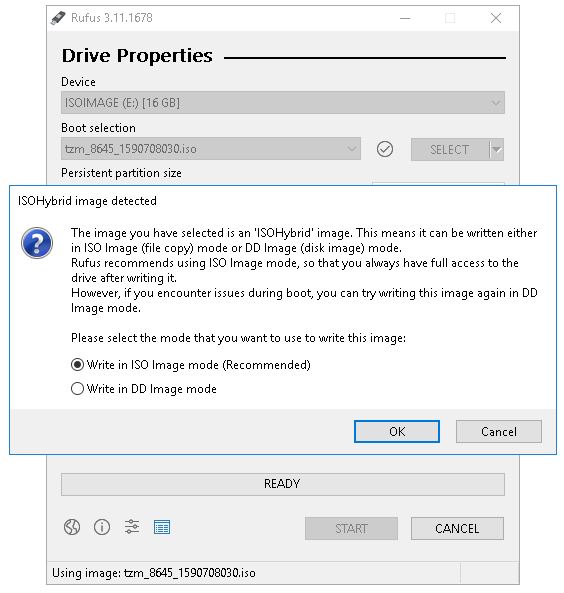
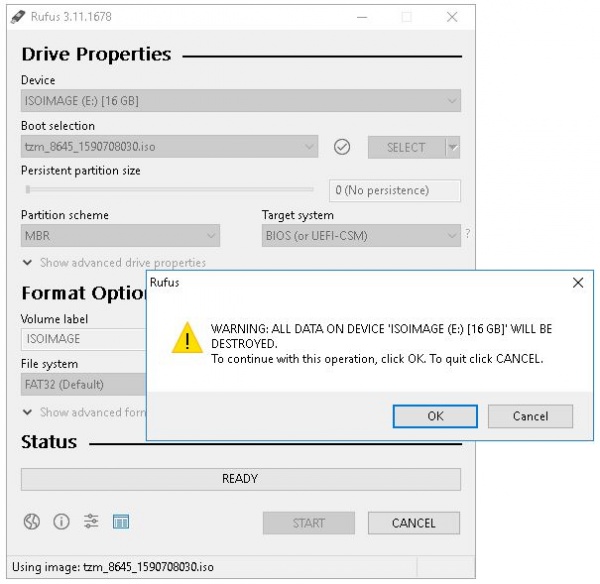
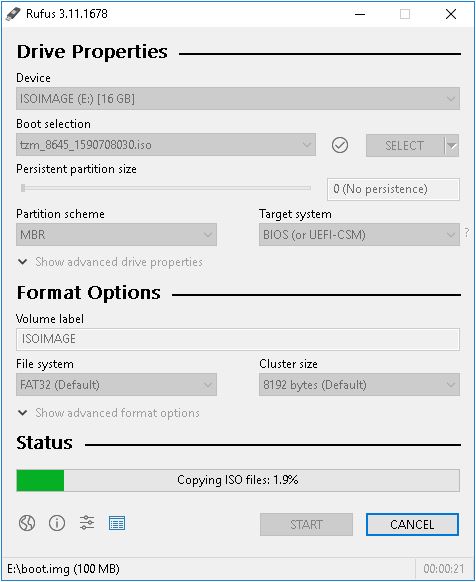
Rufus will automatically modify the settings to best match it. Click the Start button to begin the process. You'll be prompted with a couple of warnings. Please proceed with ISO(recommended) mode for first and click OK for next warning.
Step 4
Wait for the Rufus operations to complete.
Step 5
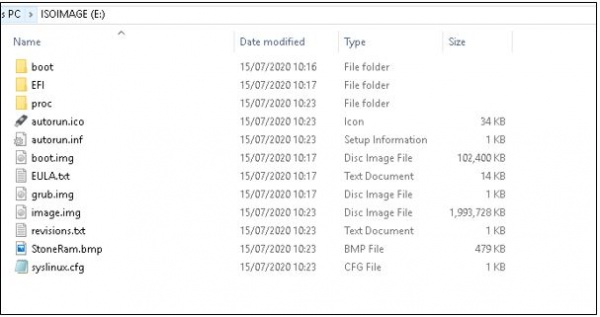
Verify the files were copied over to the USB drive.
