Difference between revisions of "Configure System Time"
From Tranzman Documentation
| (8 intermediate revisions by the same user not shown) | |||
| Line 3: | Line 3: | ||
By default Web page will redirect you to manual system time configuration. Toggle the mini white button for NTP synchronization. | By default Web page will redirect you to manual system time configuration. Toggle the mini white button for NTP synchronization. | ||
| − | Follow <b>Step 1</b> for manual sync or Step 2 for NTP synchronization. | + | Follow <b>Step 1</b> for manual sync or <b>Step 2</b> for NTP synchronization. |
===Step 1=== | ===Step 1=== | ||
| − | Select the date from the calender and time from the section underneath the clock picture (or click <b>Sync with my PC</b> for manual date/time set. | + | Select the date from the calender and time from the section underneath the clock picture (or click <b>Sync with my PC</b>) for manual date/time set. |
Manually select the timezone underneath the Timezone label. | Manually select the timezone underneath the Timezone label. | ||
| Line 20: | Line 20: | ||
| + | The Committ should redirect you to the Dashboard for adding your origin and destination backup environments. | ||
| − | |||
| − | [[ | + | [[Discovery|Jump to Discovery Page for adding backup environments]] |
[[Configuration|Back to configuration]] | [[Configuration|Back to configuration]] | ||
Latest revision as of 09:54, 6 August 2020
The System Time page lets you set TZM Appliance date/time either manually or synchronize with NTP Server.
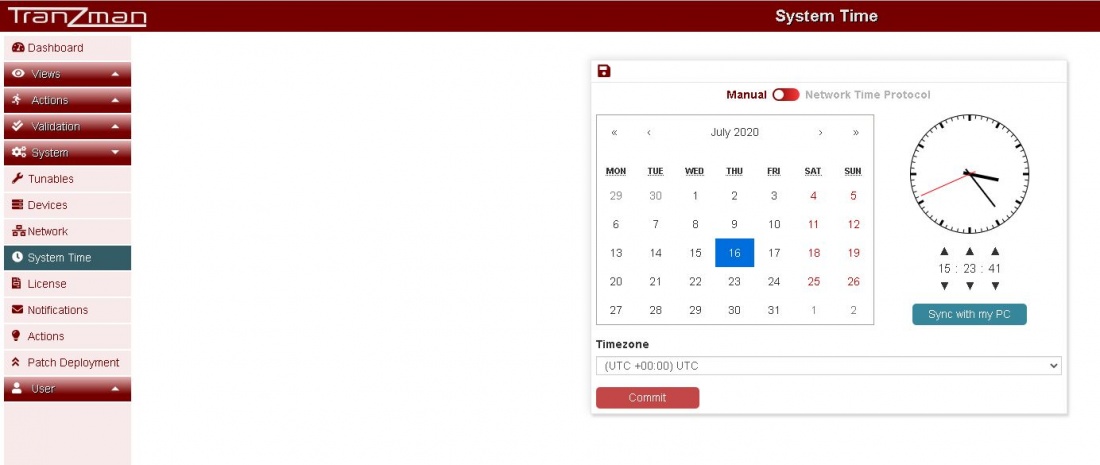
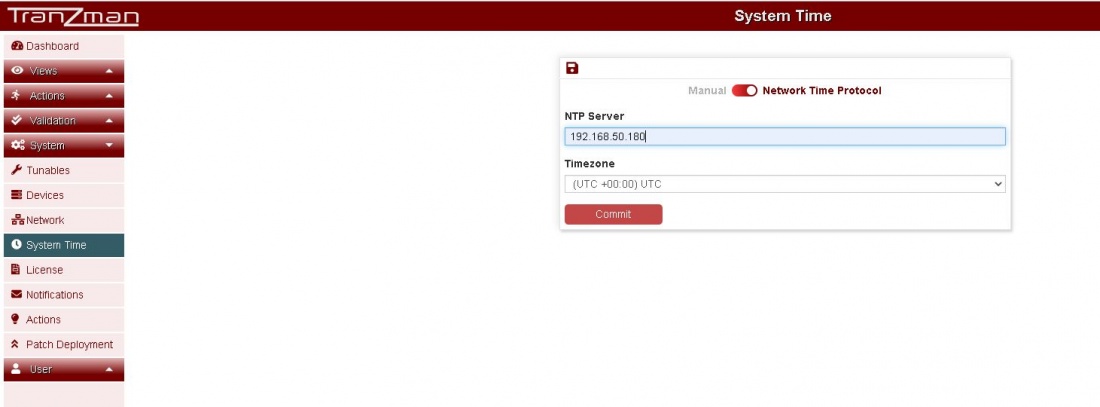
By default Web page will redirect you to manual system time configuration. Toggle the mini white button for NTP synchronization.
Follow Step 1 for manual sync or Step 2 for NTP synchronization.
Step 1
Select the date from the calender and time from the section underneath the clock picture (or click Sync with my PC) for manual date/time set.
Manually select the timezone underneath the Timezone label.
Step 2
Enter the NTP Server Address and select the intended timezone.
The Committ should redirect you to the Dashboard for adding your origin and destination backup environments.

