Difference between revisions of "Recorder Virtual Agent"
| Line 20: | Line 20: | ||
==='''Step 5'''=== | ==='''Step 5'''=== | ||
| − | Copy the generated ZIP file to the target system. | + | Copy the generated '''ZIP/TGZ''' file to the target system and run. |
| − | + | A list of steps on how to run Recorder can be found on the link below. | |
| − | |||
| − | |||
| − | |||
| − | |||
| − | |||
| − | |||
| − | |||
| − | |||
| − | |||
| − | |||
| − | |||
| − | |||
| − | |||
| − | |||
| − | |||
| − | |||
| − | |||
| + | [[Using Recorder]] | ||
---- | ---- | ||
Use this link to go back to the main Recorder [[Recorder|Overview]] Page. | Use this link to go back to the main Recorder [[Recorder|Overview]] Page. | ||
Revision as of 14:09, 9 January 2019
This is the guide for creating Virtual Agents in the Tranzman Appliance. In this guide we are using two Virtual Agents. One Origin Windows NBU server, and a Destination Linux NBU server.
Step 1
Using a Web-browser navigate to the appliance's IP address, and log in as the user admin.
Step 2
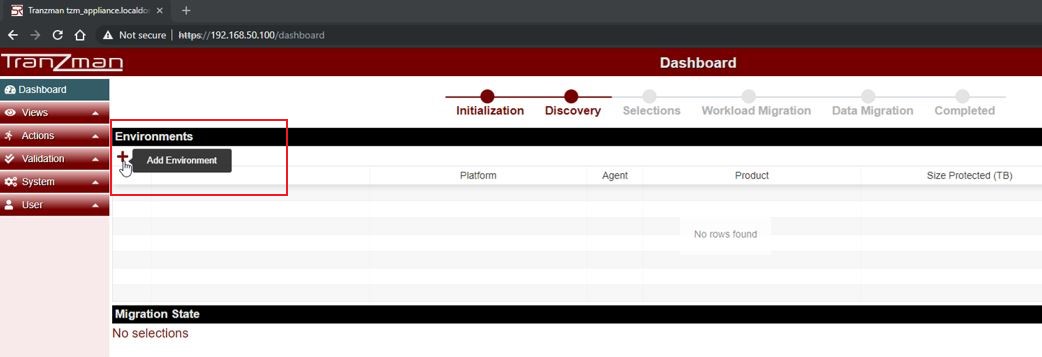
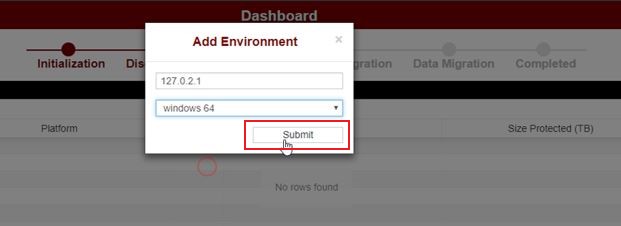
Add a new Virtual Environment, by using an IP address not currently in use. In our example, we have used IP address of 127.0.2.1.
Step 3
Select the Operating System type and click on Submit to proceed.
Step 4
Download the Tranzman Agent by clicking on the action button as shown below. This agent will need to be run on the physical/ real server.
Step 5
Copy the generated ZIP/TGZ file to the target system and run.
A list of steps on how to run Recorder can be found on the link below.
Use this link to go back to the main Recorder Overview Page.


