Difference between revisions of "Configure Personality"
From Tranzman Documentation
| Line 14: | Line 14: | ||
===Step 4=== | ===Step 4=== | ||
Review the Network Settings, make any changes if applicable, and save changes. | Review the Network Settings, make any changes if applicable, and save changes. | ||
| − | + | {|style="padding: 5px; width: 55%;" | |
| − | + | | style="width: 1%;"|[[File:Warn.png|30px]]|| style="padding: 10px; width: 85%;"|'''Warning:''' This will restart the server to commit the changes. There's no need to close the webpage, as it will refresh automatically once services are operational. | |
| − | [[File:Warn.png]] '''Warning:''' This will restart the server to commit the changes. There's no need to close the webpage, as it will refresh automatically once services are operational. | + | | |
| + | |} | ||
---- | ---- | ||
Use this link to go back to the main [[Configuration]] Page. | Use this link to go back to the main [[Configuration]] Page. | ||
Revision as of 15:40, 21 September 2018
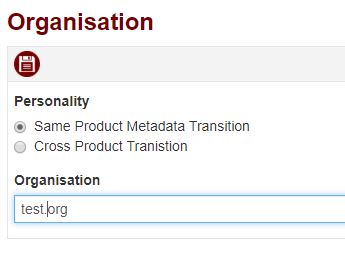
To set up the type of Migration or "Personality" switch over to the WebGUI of the Appliance.
Step 1
Open a Web Browser and navigate to the Appliance's IP address on the address bar.
Step 2
The first initial page shows the option to set the "Personality".
Step 3
Once the choice has been made, click on the image of the floppy disk to save the changes.
Step 4
Review the Network Settings, make any changes if applicable, and save changes.
| Warning: This will restart the server to commit the changes. There's no need to close the webpage, as it will refresh automatically once services are operational. |
Use this link to go back to the main Configuration Page.
