Difference between revisions of "Recovery as Normal Files(Microsoft Exchange)"
| (One intermediate revision by the same user not shown) | |||
| Line 9: | Line 9: | ||
Login to your Exchange Server.Copy the recovered database and its log files to a location you will use for your recovery. | Login to your Exchange Server.Copy the recovered database and its log files to a location you will use for your recovery. | ||
| − | e.g. In our case database name is FirstDatabase and recovery location is E:\ | + | e.g. In our case database name is FirstDatabase and recovery location is E:\Restore\FullBackup |
| Line 32: | Line 32: | ||
===Step 4=== | ===Step 4=== | ||
| − | Mount the database back and verify the mailboxes and the emails from the restored data. | + | Mount the database back and verify the mailboxes and the emails from the restored data. Check that data is present by login into WebMail as a user, and see if they can access all of their data. |
Latest revision as of 14:37, 30 November 2020
Below documentation shows how to restore Exchange data after it has been recovered as normal files using steps as shown in Recovery as Normal Files. Please recover the Exchange database files, log files as shown below. Once you have the files, please follow the steps to restore.
Step 1
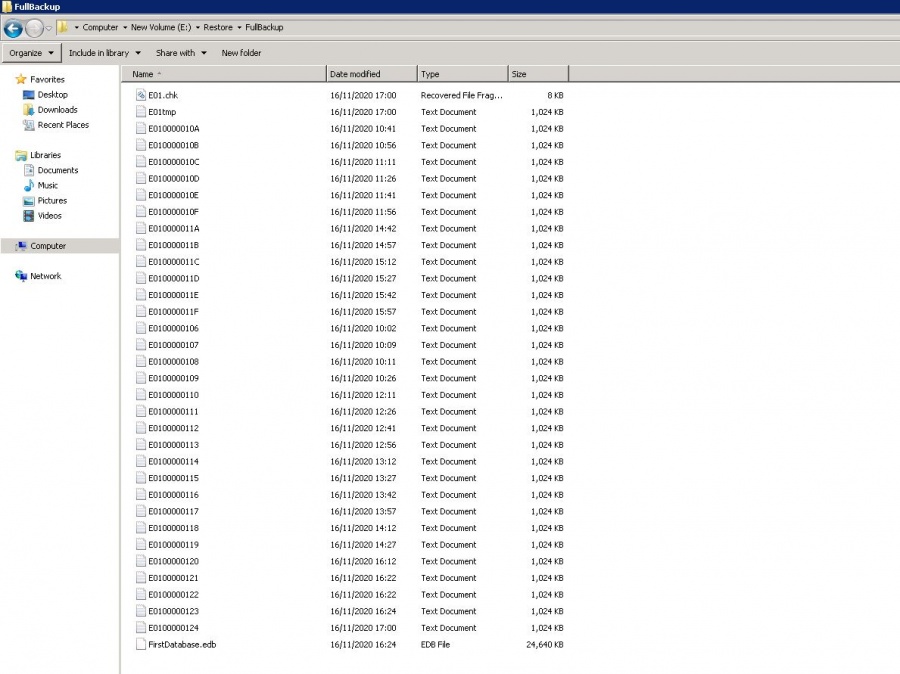
Login to your Exchange Server.Copy the recovered database and its log files to a location you will use for your recovery.
e.g. In our case database name is FirstDatabase and recovery location is E:\Restore\FullBackup
Step 2
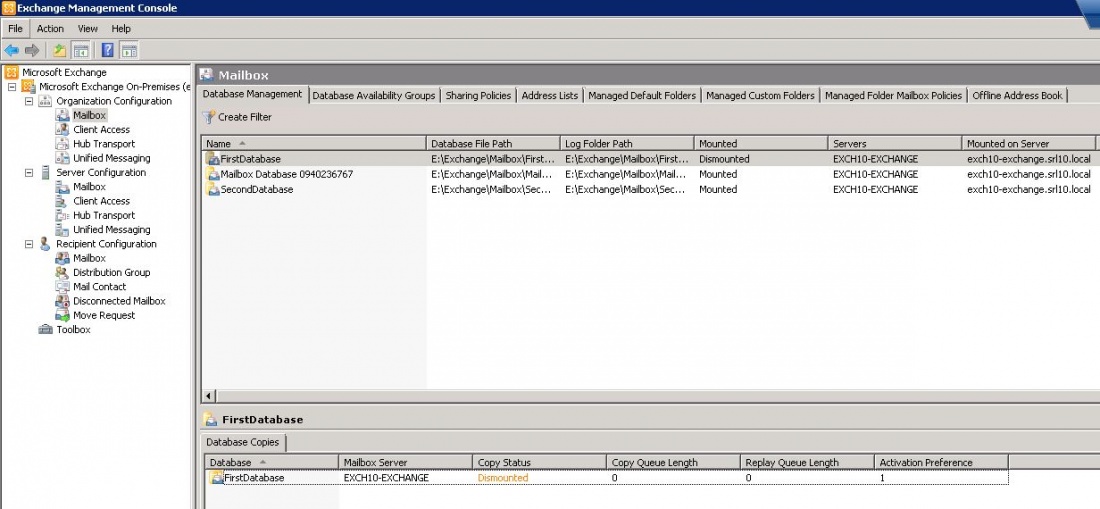
Unmount the database using powershell or using Exchange Management Console.
Step 3
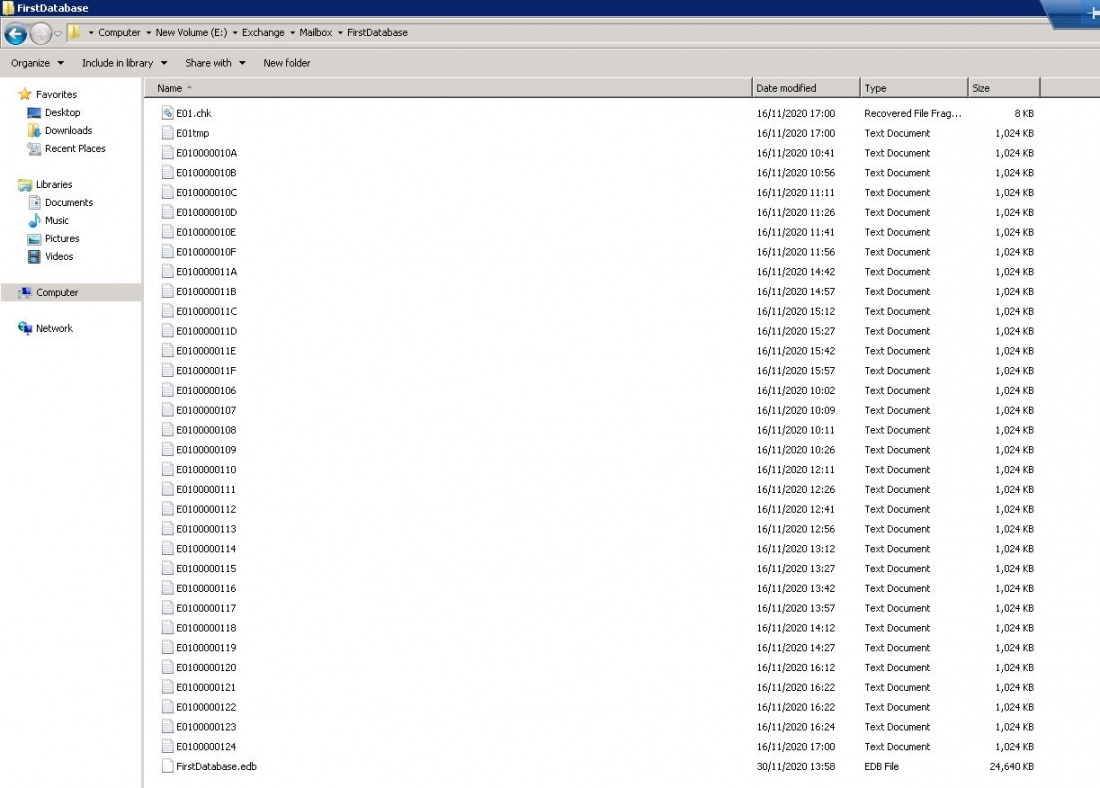
Copy and replace all the files in the database location with the files from the full backup.
e.g. In our case database location is E:\Exchange\Mailbox\FirstDatabase.And we have replaced all the existing files with the files from full backup.
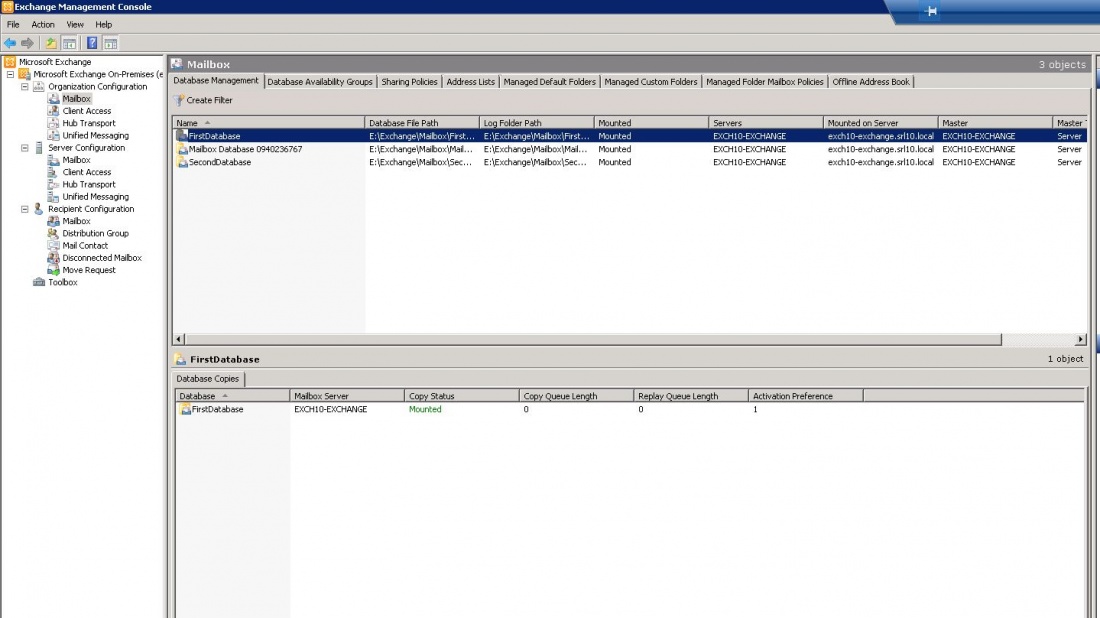
Step 4
Mount the database back and verify the mailboxes and the emails from the restored data. Check that data is present by login into WebMail as a user, and see if they can access all of their data.
Step 5
In addition for restore of data from differential incremental backups follow the similar steps as above. Obviously there will not be any database file in the files recovered from differential incremental backup, so unmount the database and copy the recovered log files to the database location and replace existing files if needed then mount the database back. Verify the restored data again.
| Note: Please note similar steps could be followed for data recovered from Cumulative Incremental backups or Copy backups. |


