Difference between revisions of "BLUE Migration"
| (33 intermediate revisions by the same user not shown) | |||
| Line 1: | Line 1: | ||
| − | |||
| − | |||
| − | |||
| − | + | ==Headline== | |
| + | |||
| + | To set up the type of Migration or "Personality" switch over to the WebGUI of the Appliance | ||
| + | |||
| + | ===Step 1.1=== | ||
| + | |||
| + | Verify that the Dashboard should already have an Environment with name <b>TZM-NAS-Connector</b>. | ||
The Dashboard enables you to check and monitor the TZM Appliance resources, migration state , service status , progress and state of Environments. | The Dashboard enables you to check and monitor the TZM Appliance resources, migration state , service status , progress and state of Environments. | ||
| − | [[File:Discovery.jpg]] | + | [[File:Discovery.jpg|border|1100x800px]] |
| + | |||
| + | ===Step 1.2=== | ||
| + | |||
| + | Click the <b>+</b> button and add the origin backup environment.Enter the IP and select the platform of the backup server and hit Committ button. | ||
| + | |||
| + | [[File:AddEnvironment.jpg|border|1100x800px]] | ||
| + | |||
| + | ===Step 1.3=== | ||
| + | |||
| + | The Dashboard should now give you an environment with name as <b>Querying instances...</b> and IP address of your backup environment. | ||
| + | Under the Agent Column hit the [[File:Agent.jpg|border]] button , this should download you a Agent package (.bin file if Origin is *nix or .exe file if Origin is Windows). | ||
| − | + | [[File:AgentDownload.jpg|border|1100x800px]] | |
| + | ===Step 1.4=== | ||
| − | + | Copy the file over to the backup server and install it.Make sure you either run the setup as administrator/root or as a user used to configure backup services. | |
| + | Follow the instructions on the screen during install. | ||
| − | + | e.g. Install of Agent on a Windows Server. | |
| − | + | [[File:AgentInstall.jpg|border|1100x900px]] | |
| − | + | ===Step 1.5=== | |
| − | + | Upon successfull installation of the Agent on the backup server all the columns for the newly added environment should be populated like e.g. As shown in the below picture. | |
| − | + | [[File:PopulateDetails.jpg|border|1100x800px]] | |
| − | |||
| − | + | <b>Note:-</b> Repeat the above steps for all the environments to be added. | |
| − | [[ | + | [[ Migration Components| Jump to Select Migration Components ]] |
| − | [[ | + | [[ Discovery | Return to Discovery]] |
Latest revision as of 11:11, 28 July 2020
Headline
To set up the type of Migration or "Personality" switch over to the WebGUI of the Appliance
Step 1.1
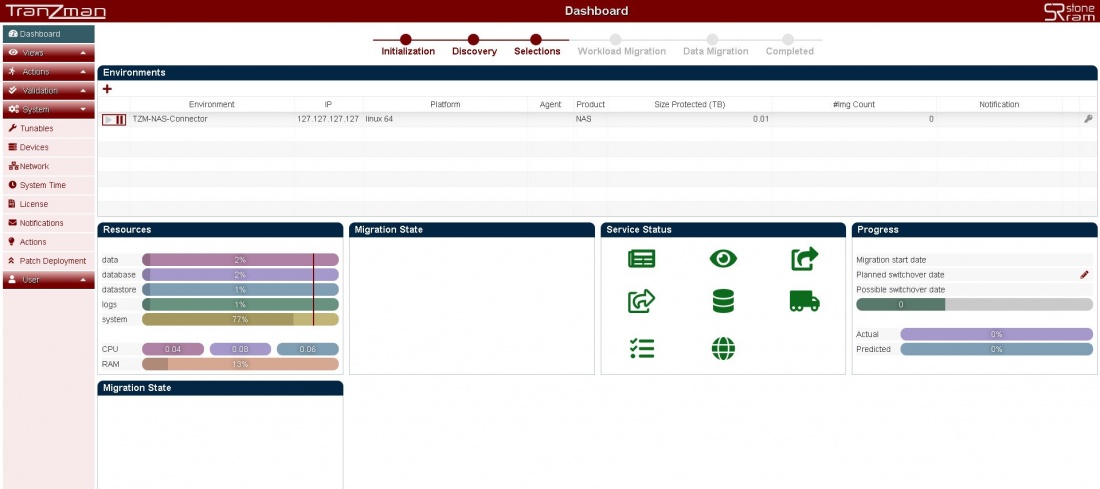
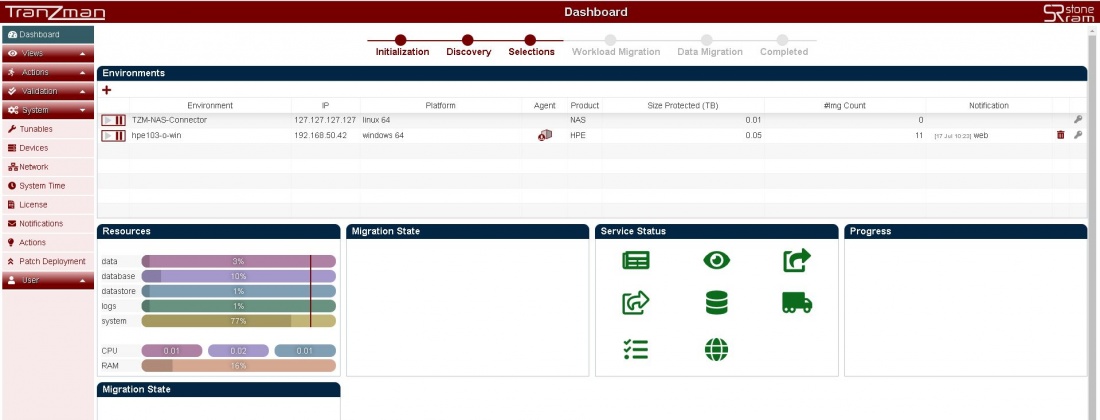
Verify that the Dashboard should already have an Environment with name TZM-NAS-Connector. The Dashboard enables you to check and monitor the TZM Appliance resources, migration state , service status , progress and state of Environments.
Step 1.2
Click the + button and add the origin backup environment.Enter the IP and select the platform of the backup server and hit Committ button.
Step 1.3
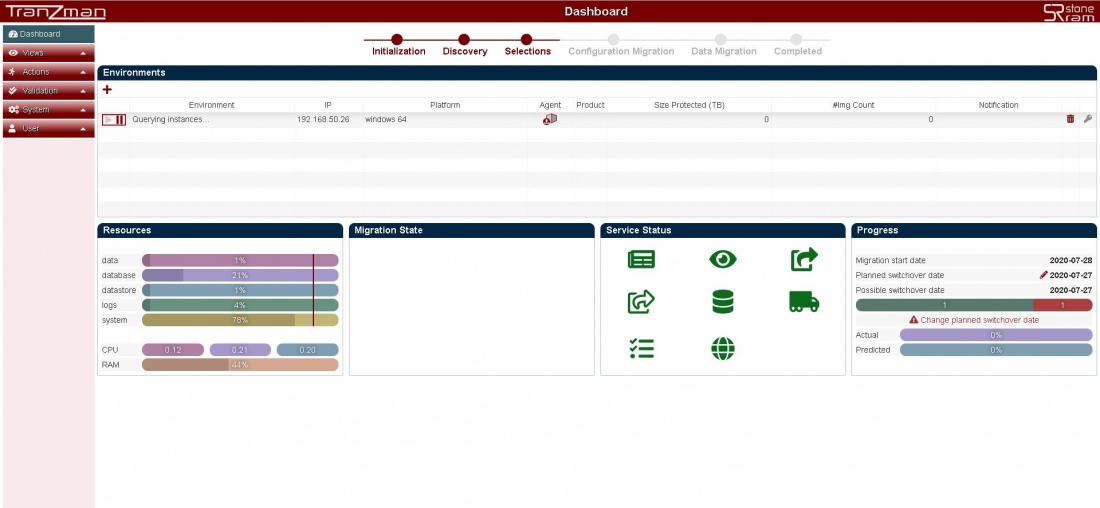
The Dashboard should now give you an environment with name as Querying instances... and IP address of your backup environment.
Under the Agent Column hit the ![]() button , this should download you a Agent package (.bin file if Origin is *nix or .exe file if Origin is Windows).
button , this should download you a Agent package (.bin file if Origin is *nix or .exe file if Origin is Windows).
Step 1.4
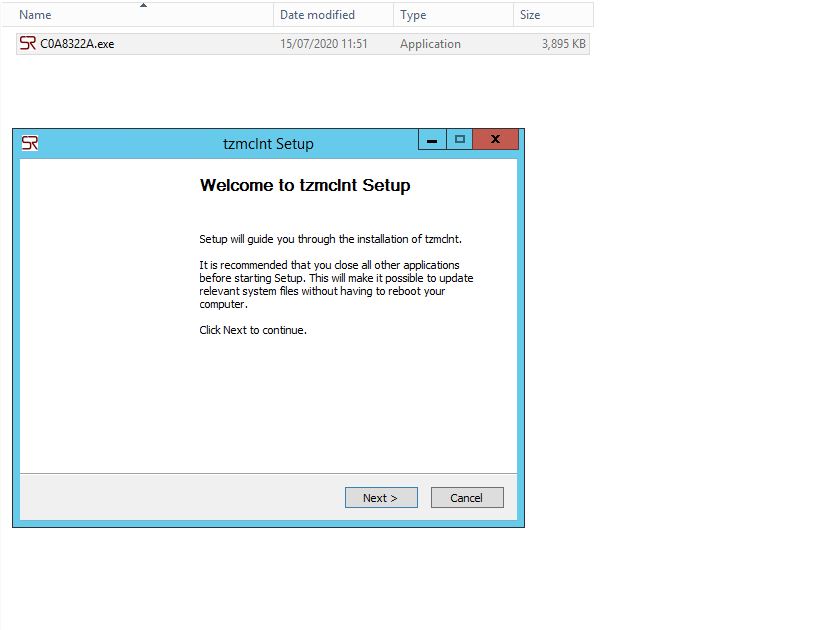
Copy the file over to the backup server and install it.Make sure you either run the setup as administrator/root or as a user used to configure backup services. Follow the instructions on the screen during install.
e.g. Install of Agent on a Windows Server.
Step 1.5
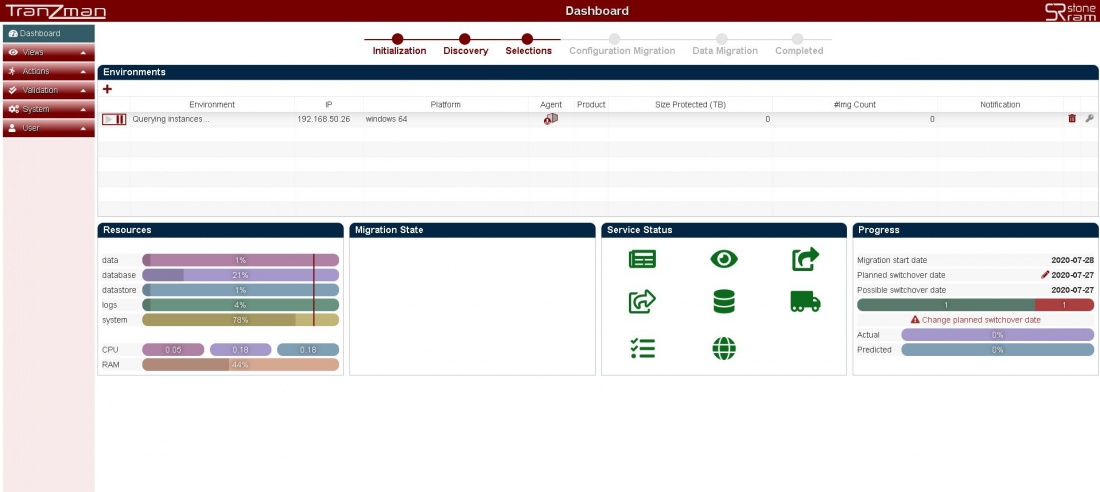
Upon successfull installation of the Agent on the backup server all the columns for the newly added environment should be populated like e.g. As shown in the below picture.
Note:- Repeat the above steps for all the environments to be added.
