Difference between revisions of "Recovery as Normal Files(MSSQL)"
From Tranzman Documentation
| Line 22: | Line 22: | ||
| − | [[File:SQL_SSMS_Connect.JPG | border| | + | [[File:SQL_SSMS_Connect.JPG | border|900x700px]] |
| Line 31: | Line 31: | ||
| − | [[File:SelectRestoreDatabase.JPG | border| | + | [[File:SelectRestoreDatabase.JPG | border|900x700px]] |
| Line 40: | Line 40: | ||
| − | [[File:SelectDataFile.JPG | border| | + | [[File:SelectDataFile.JPG | border|900x700px]] |
| Line 52: | Line 52: | ||
| − | [[File:DataRestoreProgress.JPG | border| | + | [[File:DataRestoreProgress.JPG | border|900x700px]] |
| Line 61: | Line 61: | ||
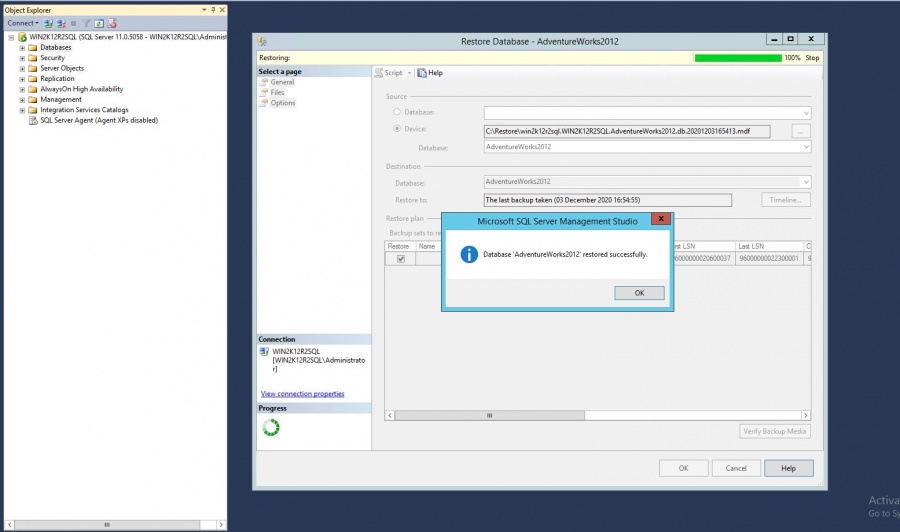
| − | [[File:DataRestored.JPG | border| | + | [[File:DataRestored.JPG | border|900x700px]] |
[[ DP/DataProtector Recovery | Return to DP/DataProtector Recovery ]] | [[ DP/DataProtector Recovery | Return to DP/DataProtector Recovery ]] | ||
Revision as of 11:15, 16 December 2020
Below documentation shows how to restore MS-SQL data after it has been recovered as normal files using steps as shown in Recovery as Normal Files . Please recover the MS-SQL database and log files. Once you have the files, please follow the steps to restore.
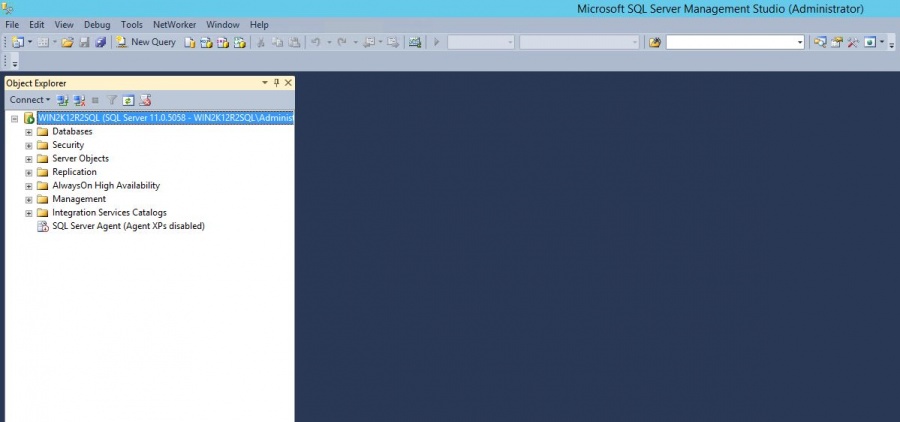
We are demonstrating recovery of data file for AdventureWorks20212 database (shown in below picture).
| Note: There are different ways to perform MS-SQL DB restore's like through SSMS or SQL query etc. For more detailed information refer to the Microsoft SQL Database Restore Documentation. |
Step 1
Login to SSMS(SQL Server Management Studio) and connect to the SQL Server Instance.
Step 2
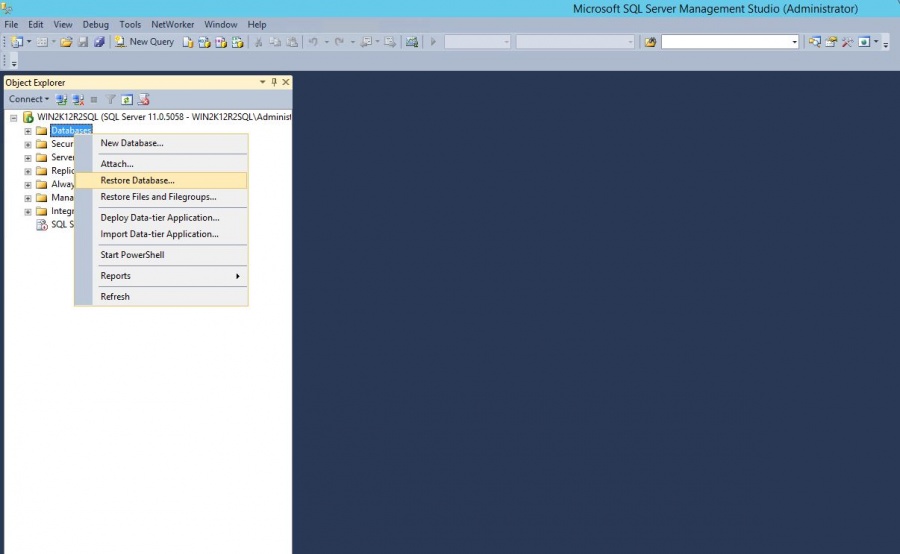
Right Click and select Restore Database.
Step 3
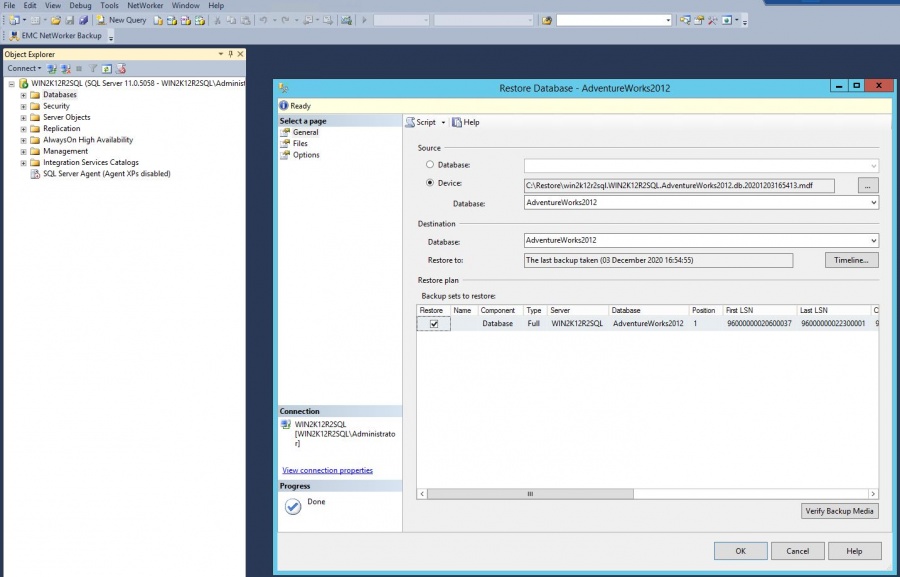
From Device , select the data file to restore.
After that , optionally you can click on Verify Backup Media too.
Step 4
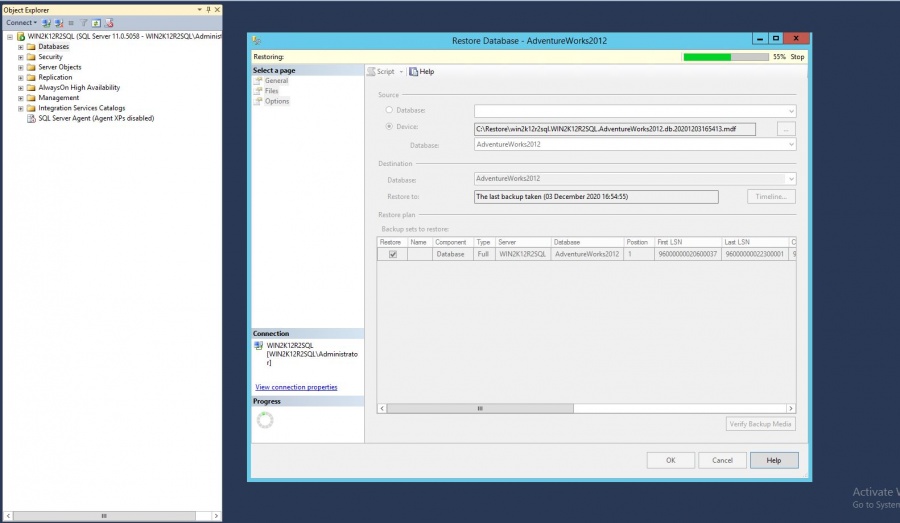
Click on OK and start the restore. Your data should start restoring.
Step 5
Verify the restored data,once restore has been successful

