Difference between revisions of "Recovery as Normal Files(SAP HANA)"
| (4 intermediate revisions by the same user not shown) | |||
| Line 148: | Line 148: | ||
Click on Next a couple of times and then click Finish. Before clicking on Finish you can also have a look at the SQL Statement used by clicking on Show SQL Statement. | Click on Next a couple of times and then click Finish. Before clicking on Finish you can also have a look at the SQL Statement used by clicking on Show SQL Statement. | ||
| − | |||
[[File:SAPHANAStep12.JPG | border|1100x800px]] | [[File:SAPHANAStep12.JPG | border|1100x800px]] | ||
| − | Once you click Finish you will get a warning of Manipulate data on the system. Click yes and proceed. | + | Once you click Finish you will get a warning of Manipulate data on the system. Click yes and proceed. |
| + | |||
| + | [[File:SAPHANAStep13.JPG | border|1100x800px]] | ||
| − | |||
| + | Your data should start getting restored. | ||
[[File:SAPHANAStep14.JPG | border|1100x800px]] | [[File:SAPHANAStep14.JPG | border|1100x800px]] | ||
| + | |||
| + | |||
| + | |||
| + | ===Step 10=== | ||
| + | |||
| + | A successful restore should display the below message and also bring the whole system online. | ||
| + | |||
| + | |||
| + | [[File:SAPHANAStep15.JPG | border|1100x800px]] | ||
[[ DP/DataProtector Recovery | Return to DP/DataProtector Recovery ]] | [[ DP/DataProtector Recovery | Return to DP/DataProtector Recovery ]] | ||
Latest revision as of 13:45, 5 October 2020
Contents
Headline
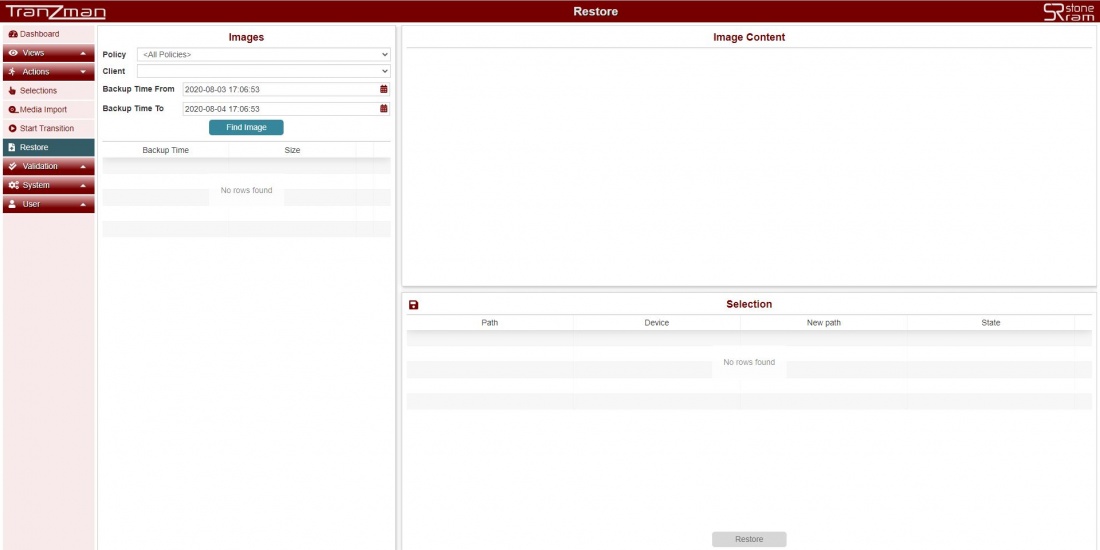
Tranzman UI provides a user friendly interface to browse the migrated images and restore data to the mounted NFS/CIFS share as per the Devices page. Click on Actions on sidebar and Select Restore. You should see the restore page with three sections.
- Images section for selecting the images to restore data from.
- Image Content section for browsing through the data in the selected images and select the contents you want to restore.
- Selection section for reviewing selected content for restore and run the restore for the selected.
So follow the below steps to perform the restore of SAP HANA Backups.
Step 1
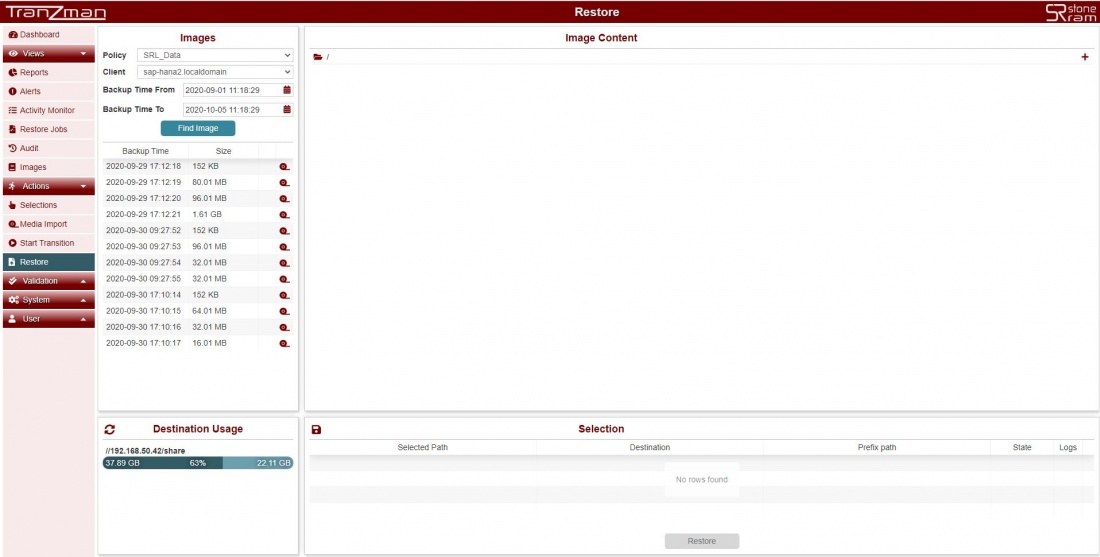
Select the Policy, Client, Backup Time From, Backup Time To and hit on and you should see all the images in the time interval selected.
| Note: Our SAP HANA Server is saphana2.localdomain. We are restoring a full backup from 2020-09-29. |
Step 2
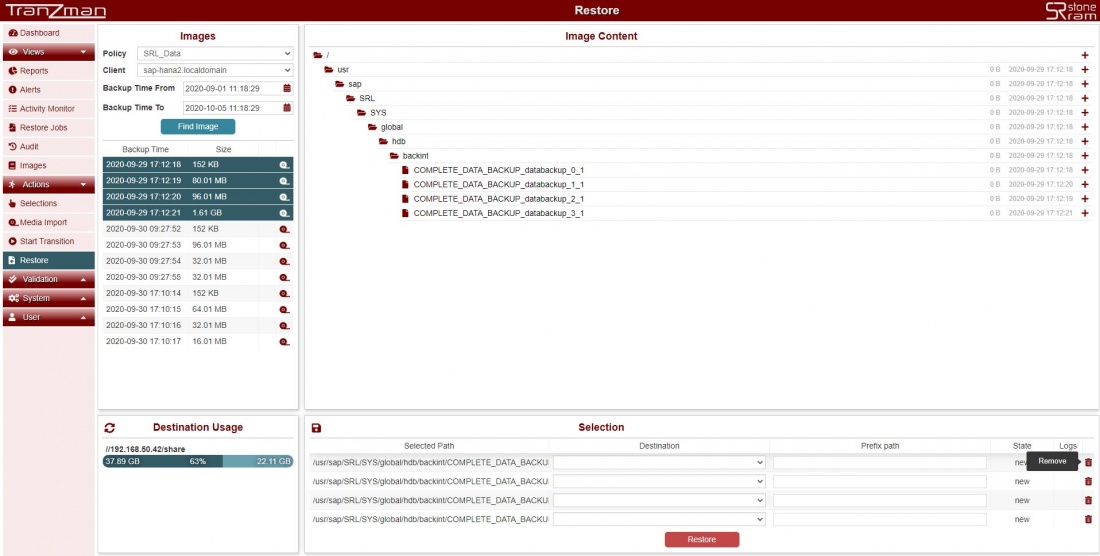
Select the image you want to restore the data from Images section.Browse through the data in that Image in Image Content section and select it to restore.
Step 3
From the Selection section on the webpage , select the Destination for the restore. This refers to the NFS/CIFS share mounted for restoring data under Devices .Then enter the
path (name of folder) where you want the data to be restored and click on . This should trigger the restore and the Restore button should be greyed out.
Step 4
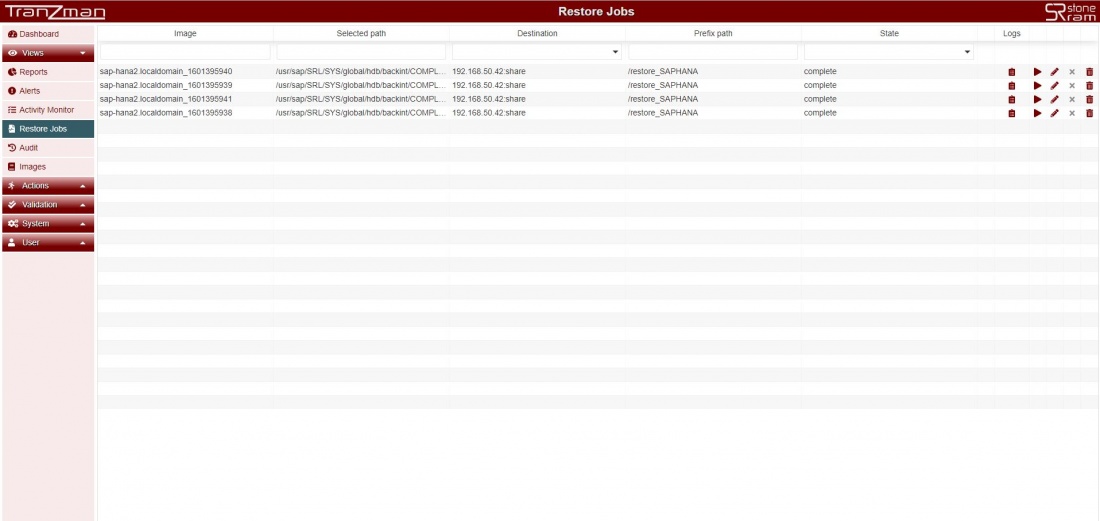
Once the Restore job is triggered successfully , you would see new jobs in Tasks under Views->Tasks on the sidebar. Additionaly there is another section under Views->Tasks named Restore logs (shown below) where user can check the restore status , and also re-run the restore with or without modifications for restore paths.
Step 5
When the restore is completed, copy the restored files from the share to the SAP HANA Server. Then login to the SAP HANA Studio.
| Note: For this restore we have the below files restored by the Tranzman Appliance.Same has been copied to our SAP HANA
server under |
|
sap-hana2:/tmp/restore_SAPHANA # pwd /tmp/restore_SAPHANA sap-hana2:/tmp/restore_SAPHANA # ls -ltr total 1869792 -rw-r--r-- 1 root root 155648 Oct 2 11:44 COMPLETE_DATA_BACKUP_databackup_0_1 -rw-r--r-- 1 root root 83894272 Oct 2 11:44 COMPLETE_DATA_BACKUP_databackup_2_1 -rw-r--r-- 1 root root 100671488 Oct 2 11:44 COMPLETE_DATA_BACKUP_databackup_1_1 -rw-r--r-- 1 root root 1728061440 Oct 2 11:45 COMPLETE_DATA_BACKUP_databackup_3_1 |
Step 6
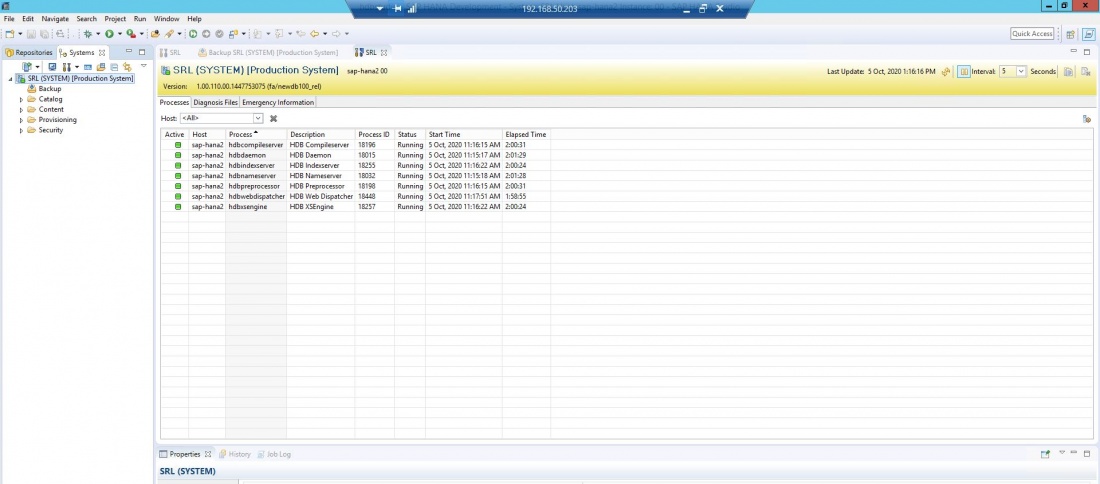
Login to the SAP HANA Studio and connect to the SRL instance.
Step 7
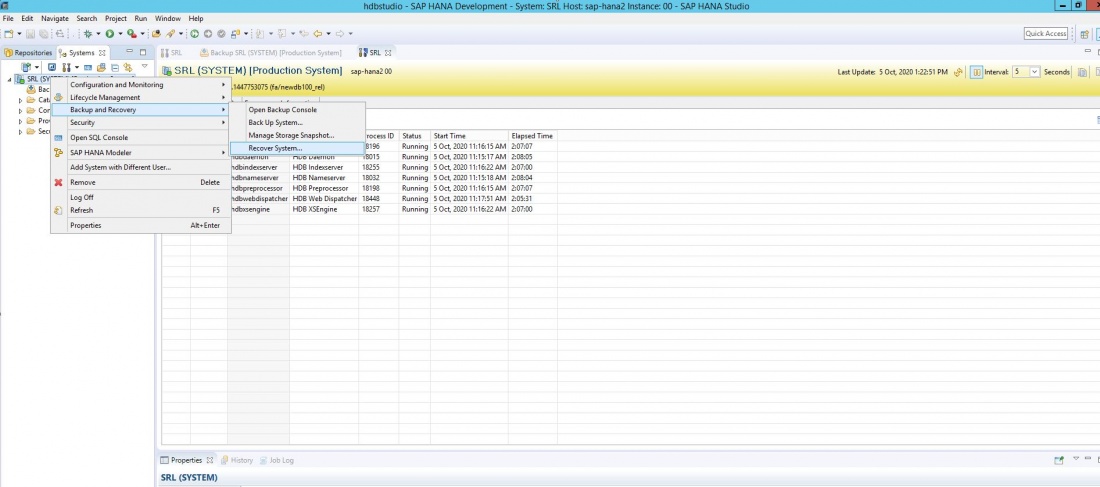
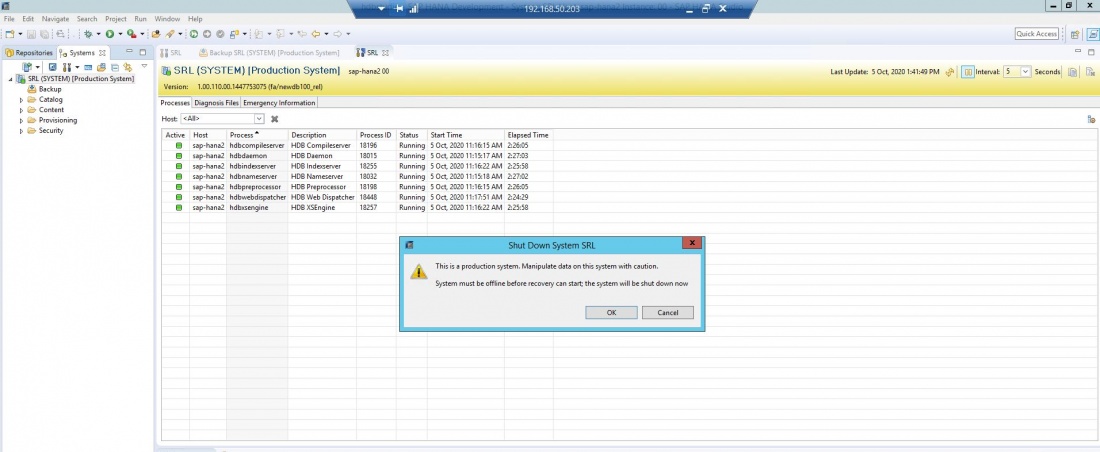
Right click on the instance name and Select Recover System under Backup and Recovery. Please be aware for SAP HANA restore System needs to be offline which is what you will see as warning as soon as you click on Recover System. Select OK and make the system offline.
Step 8
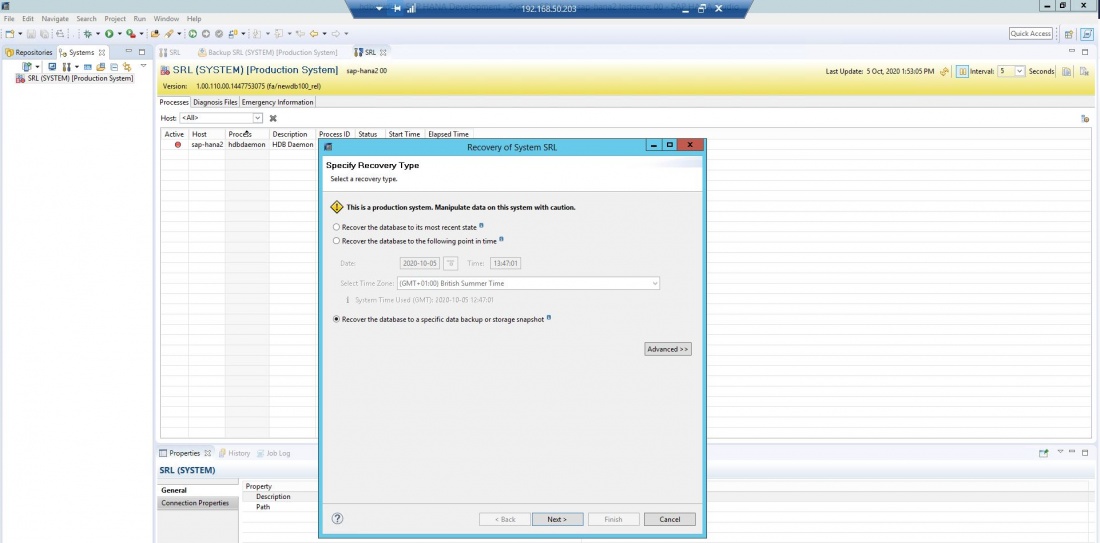
Once the system is offline, it should open a new window as shown in the below screenshot.
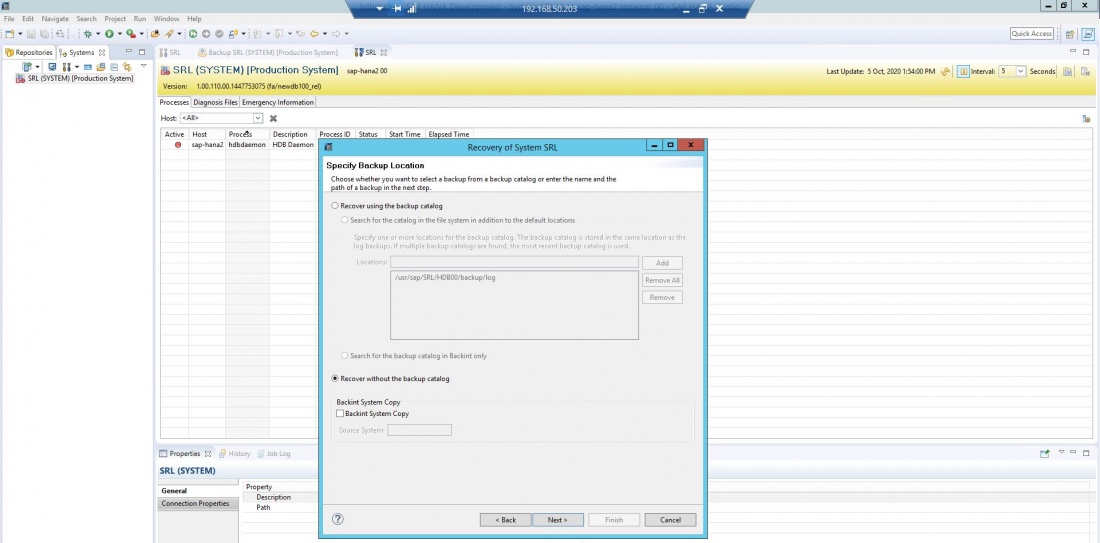
Select the option of "Recover the database to a specific data backup or storage snapshot". And then "Recover without the backup catalog".
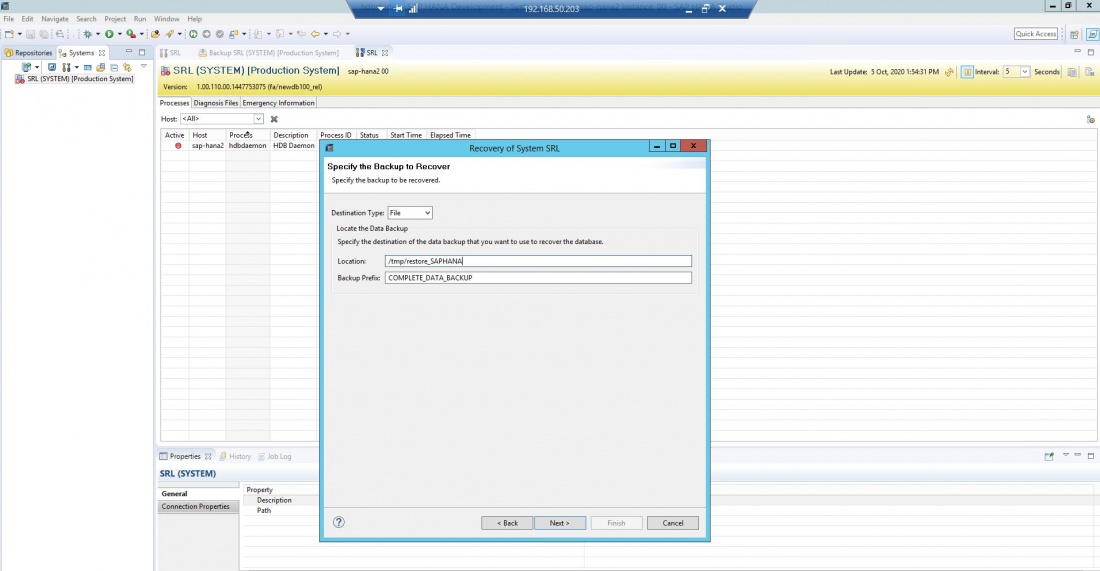
Select the destination type as File and then enter the location where your restored files are on the SAP HANA server.
e.g. -> In our case it's under /tmp/restore_SAPHANA
Step 9
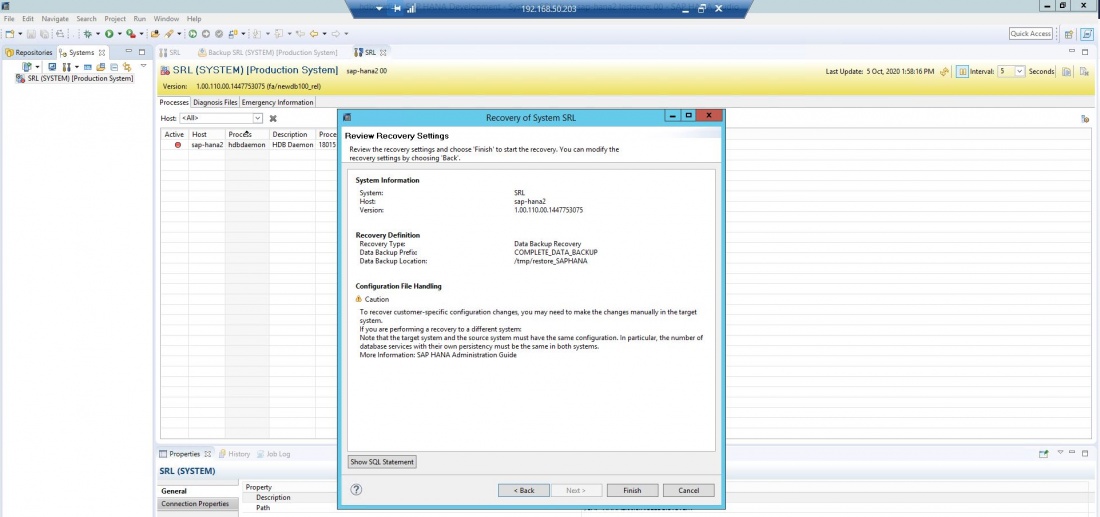
Click on Next a couple of times and then click Finish. Before clicking on Finish you can also have a look at the SQL Statement used by clicking on Show SQL Statement.
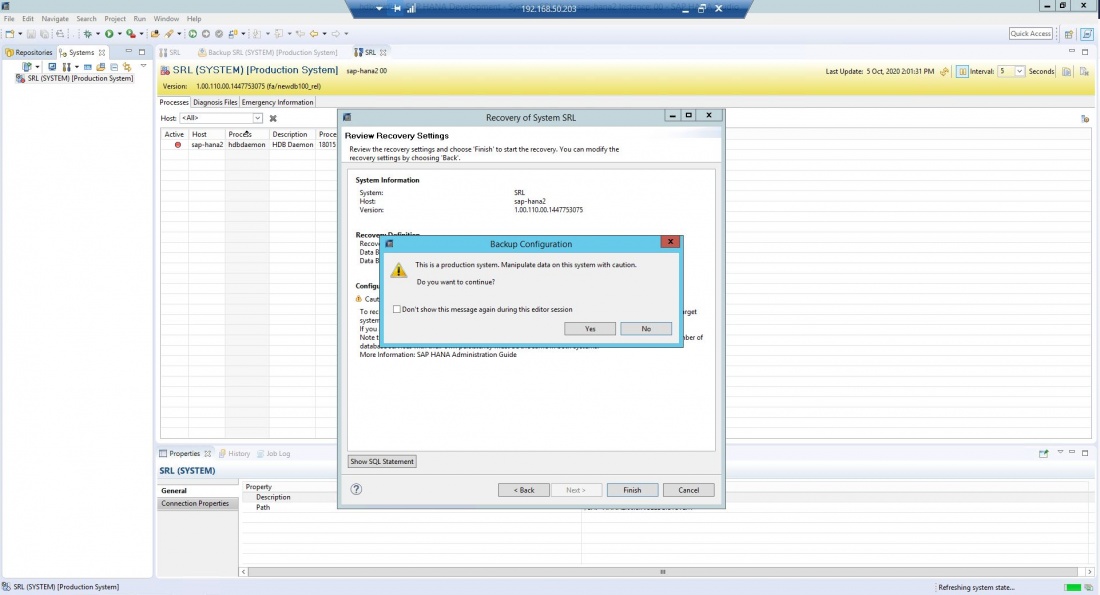
Once you click Finish you will get a warning of Manipulate data on the system. Click yes and proceed.
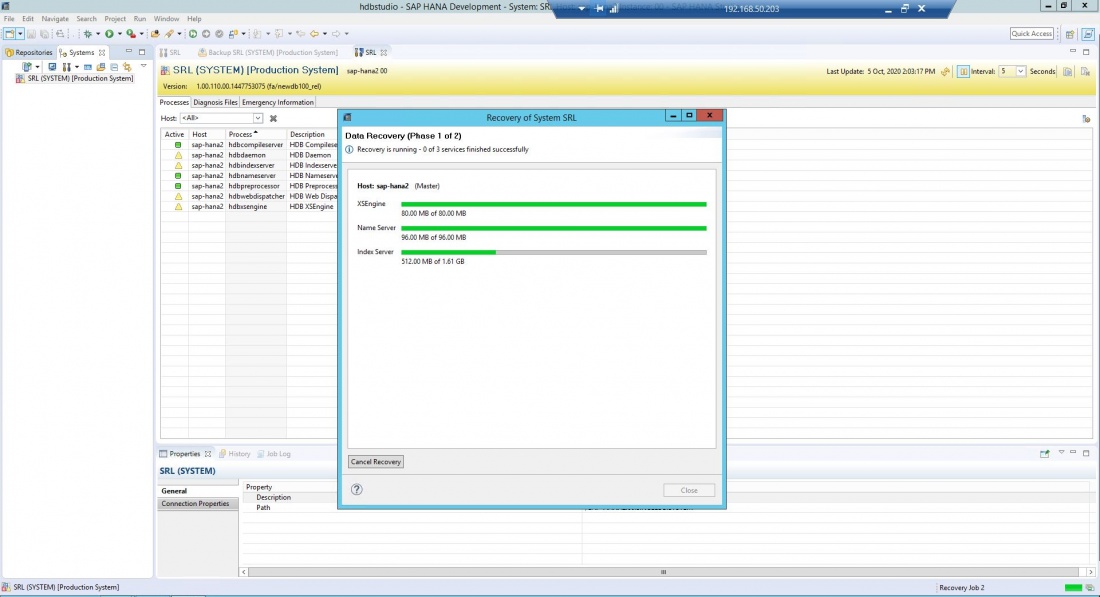
Your data should start getting restored.
Step 10
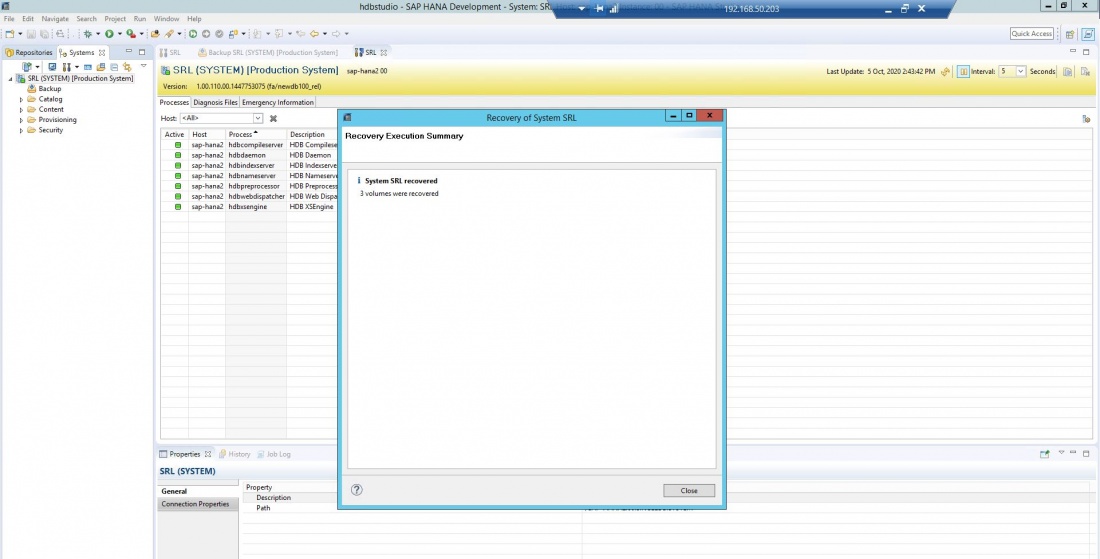
A successful restore should display the below message and also bring the whole system online.
